 FlashBoards Learn
Lighting · Film language
Side Lighting
Also called: side light, side-lit, split lighting
Side lighting places the key light about 90° to one side of the subject, so one half of the face is lit and the other falls into shadow, and the light rakes across skin, fabric and walls. It is the most direct way to show volume, texture and a character divided against themselves.
- What it does
- Splits the subject into a lit side and a dark side and pulls every bump of texture forward with long, raking shadows.
- Use it when
- A close-up needs tension, secrecy or inner conflict, or a surface needs to look rough, old and physical.
- Watch out
- With no fill the shadow eye goes black and the actor loses half the performance; decide whether you want that.
- Try this prompt
Close-up, one hard key 90° camera left at eye height, right half of the face in deep shadow, split lighting, dark background
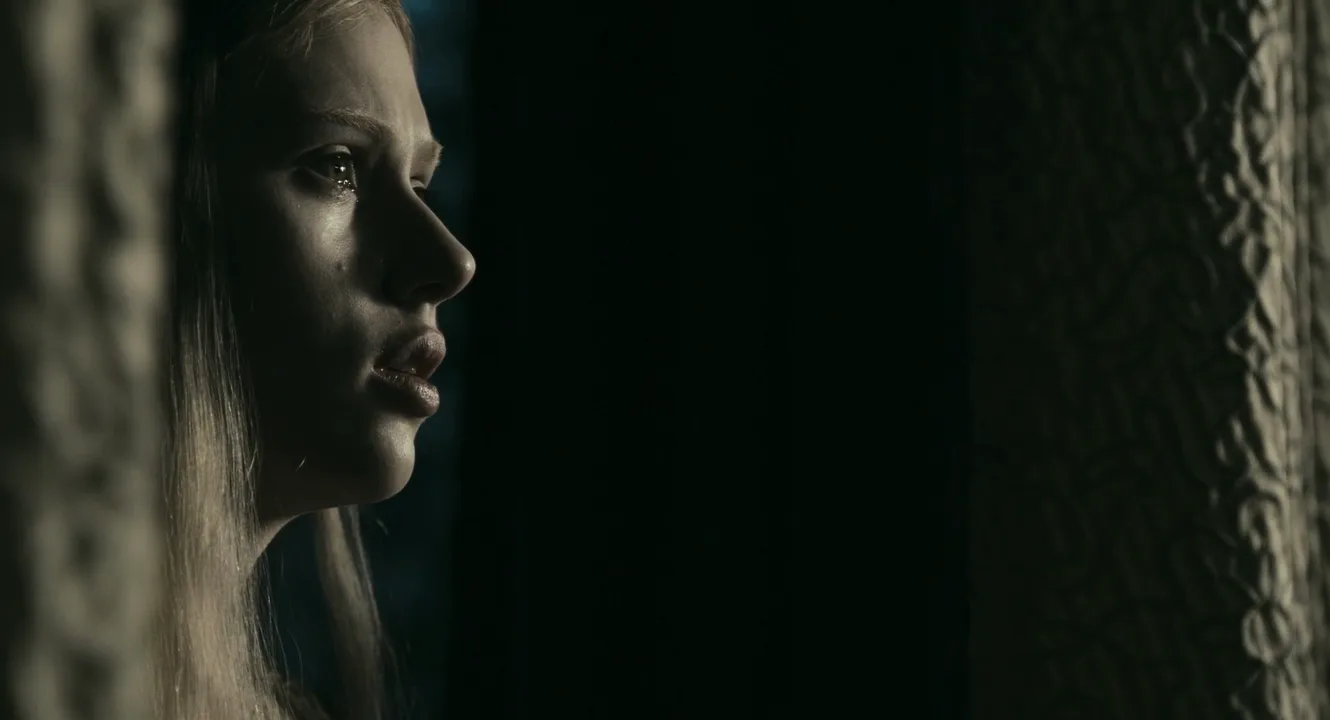
What is side lighting?
Side lighting is a placement of the key light: the main source hits the subject from the side, roughly perpendicular to the camera–subject line. It grazes the near cheek, catches the ridge of the nose and stops; everything past that ridge is in shadow.
Two things happen at once. The face divides into a bright half and a dark half, and every surface the light crosses shows its texture: pores, stubble, knit, plaster. Front light fills those hollows; side light gives each one its own shadow.
Any source works, from a window to an open Fresnel; the angle is what counts. Among the portrait patterns of film lighting it sits at the far end: front, loop, Rembrandt at 45°, then side light at 90°.
Why do filmmakers use side lighting?
Half a face in darkness reads as a person with a hidden side: a decent man doing something indecent, a witness deciding whether to lie. We see one eye and sense the other watching from out of reach.
Side light also adds weight and age. A raking source turns skin into topography, which ties it to chiaroscuro and film noir, where one strong source carves figures out of the dark.
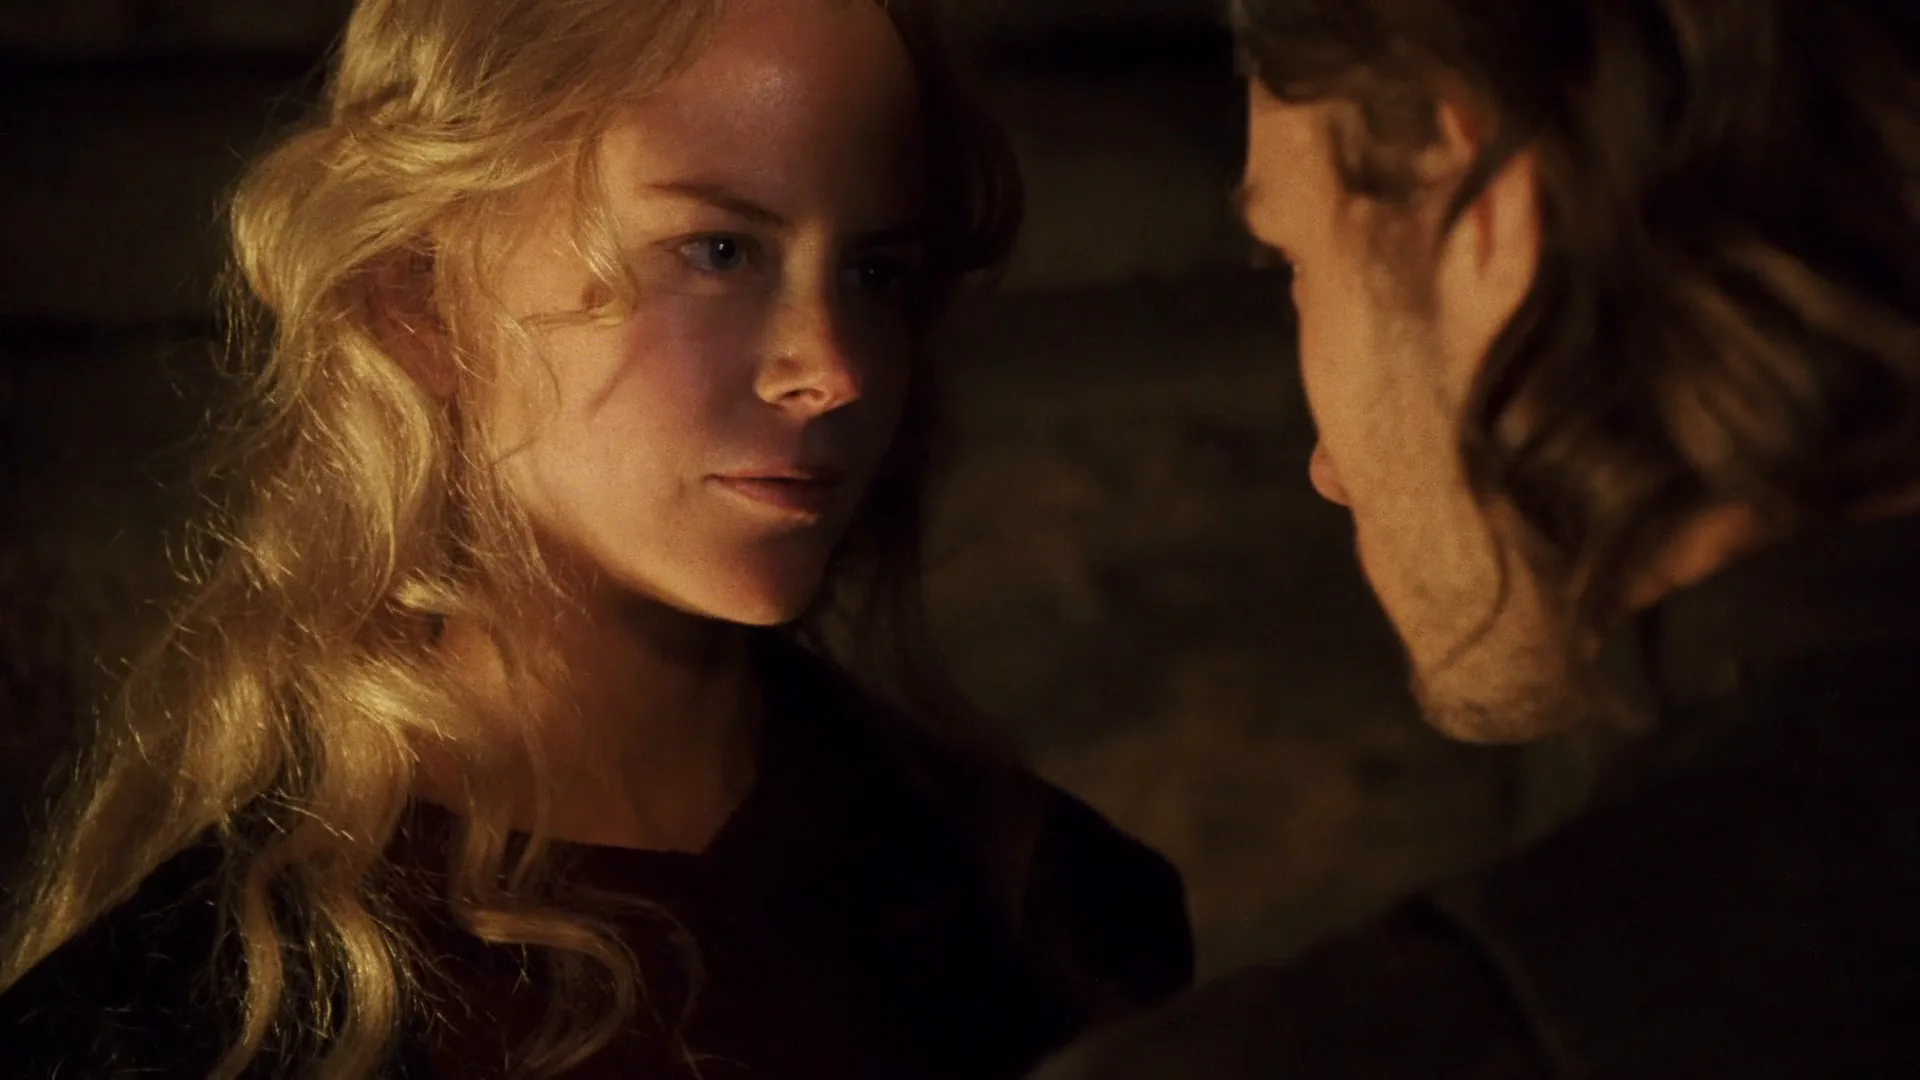
Most side light in cinema is motivated. Seat an actor beside a window or hearth and the pattern comes for free: the firelight of Cold Mountain (2003) or the window of The Other Boleyn Girl (2008) below.
How to shoot side lighting
Place the key at 90°. Level with the actor's head or slightly above, 1–2 m away, at a right angle to the lens axis. When the shadow line runs down the ridge of the nose, you are there.
Choose hard or soft. A bare Fresnel or direct sun gives a crisp line and aggressive texture, hard light at its most graphic. A large diffusion frame gives a gradual falloff, kinder to skin and easier to hold when the actor moves.
Set the ratio. No fill gives a full split. A white bounce lifts the dark side to around 4:1 so the shadow eye still reads; a black flag deepens it for noir.
Mind the head. Turn the face 15° toward the source and you are in Rembrandt territory; turn it away and only the profile edge glows. Give the actor an eyeline mark, keep the background one to three stops under the lit cheek and use a 50–85 mm lens at eye level.
What is split lighting?
Split lighting is the strict version of side light: the key is exactly at 90° and at eye level, so the line between light and shadow runs down the middle of the face and the far eye gets no light at all.
It is the most stylized pattern of the family, usually held for a single revealing close-up, a threat or a confession, and a common base for low-key lighting, where only the lit half survives against black.
Side lighting vs. Rembrandt lighting
Both leave half the face in shadow; the difference is about 45° of rotation. Rembrandt lighting puts the key high and 45° to the side, leaving a small triangle of light under the far eye. Side lighting swings the lamp to 90°: the triangle closes, the far cheek goes dark and the shadow eye may vanish.
The quick test is the shadow cheek: a closed triangle means Rembrandt, no light at all means side light. Raise the key toward the ceiling and you get top lighting instead, with the eyes sunk in their sockets.
Side Lighting examples in film
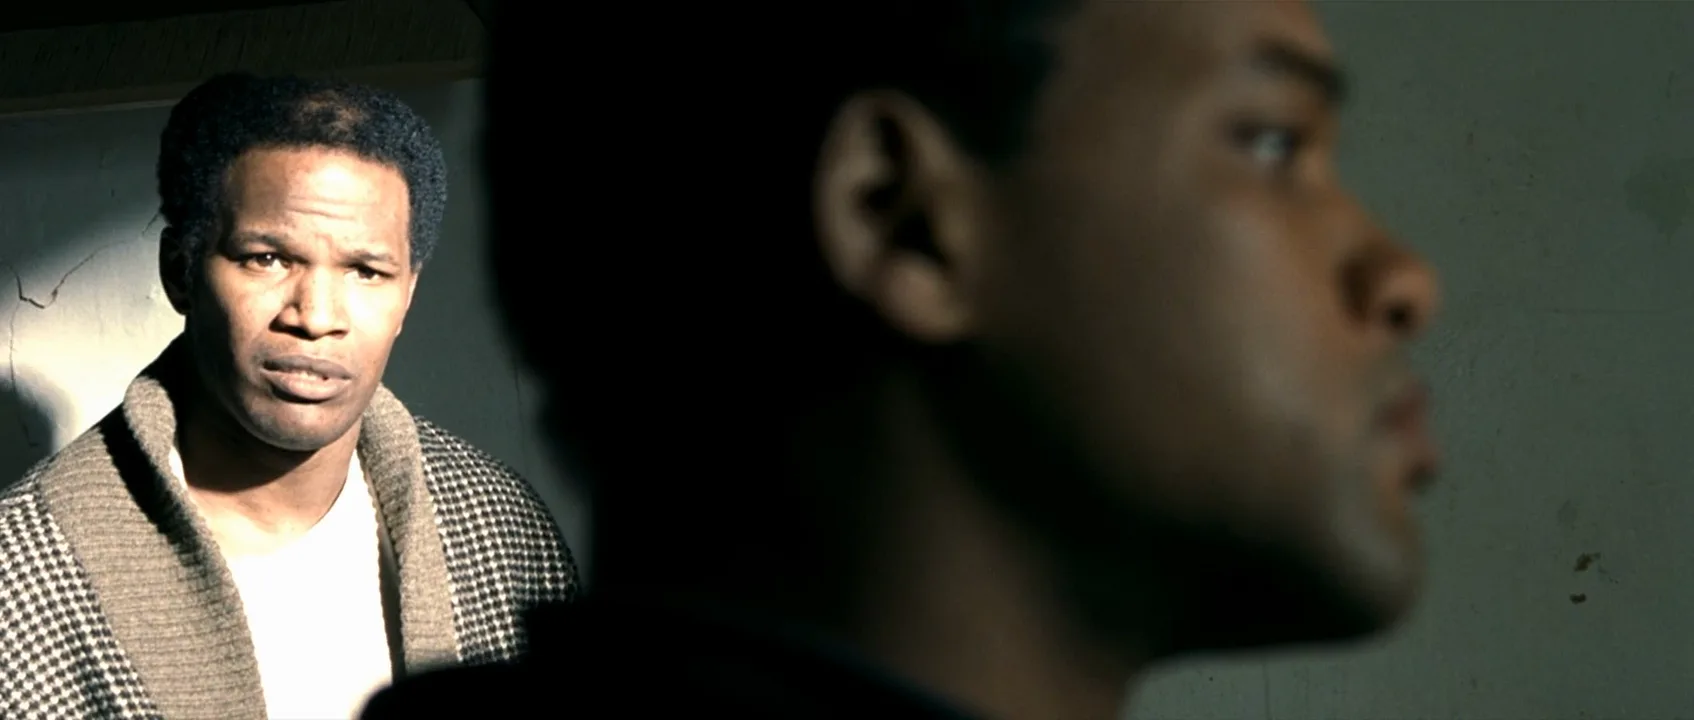
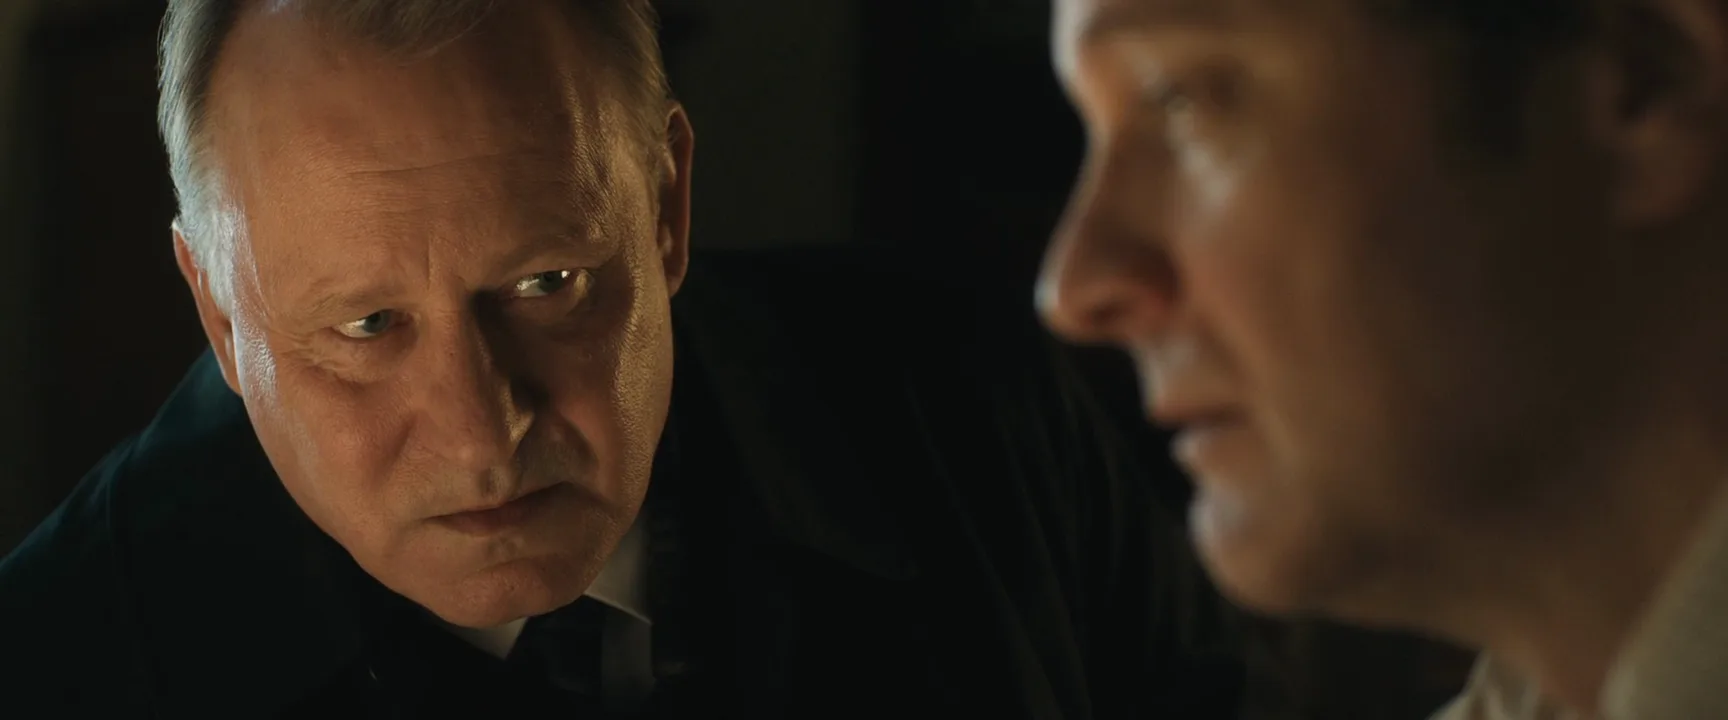
8 framesFrames where the main source sits beside the subject. Look for the line where light turns to shadow.
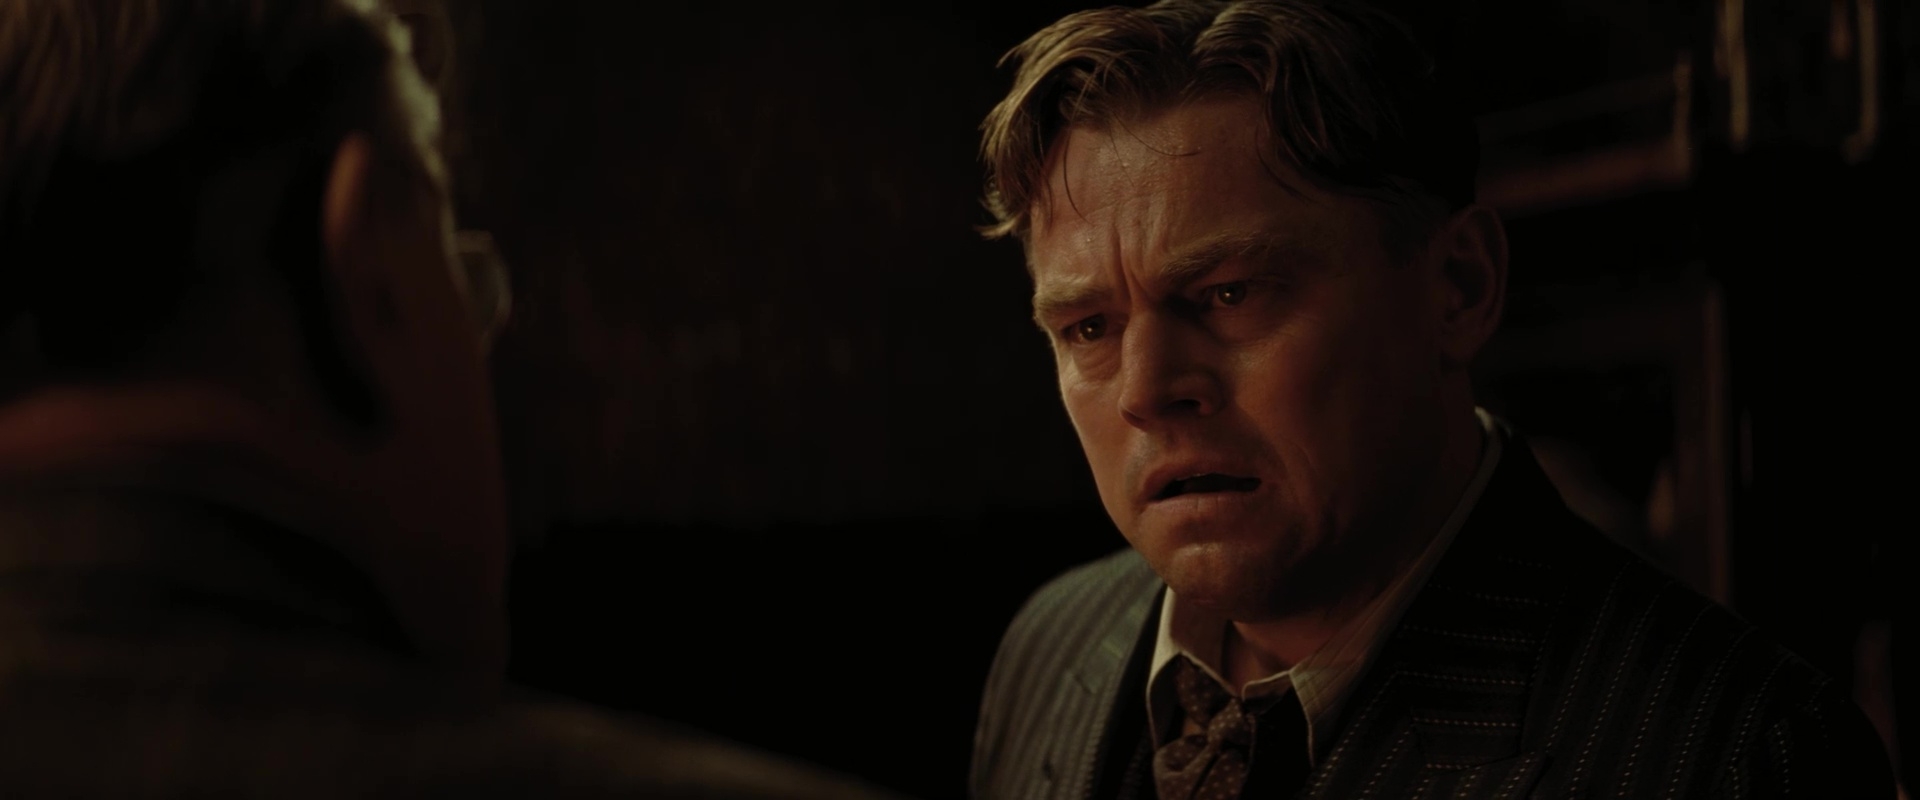
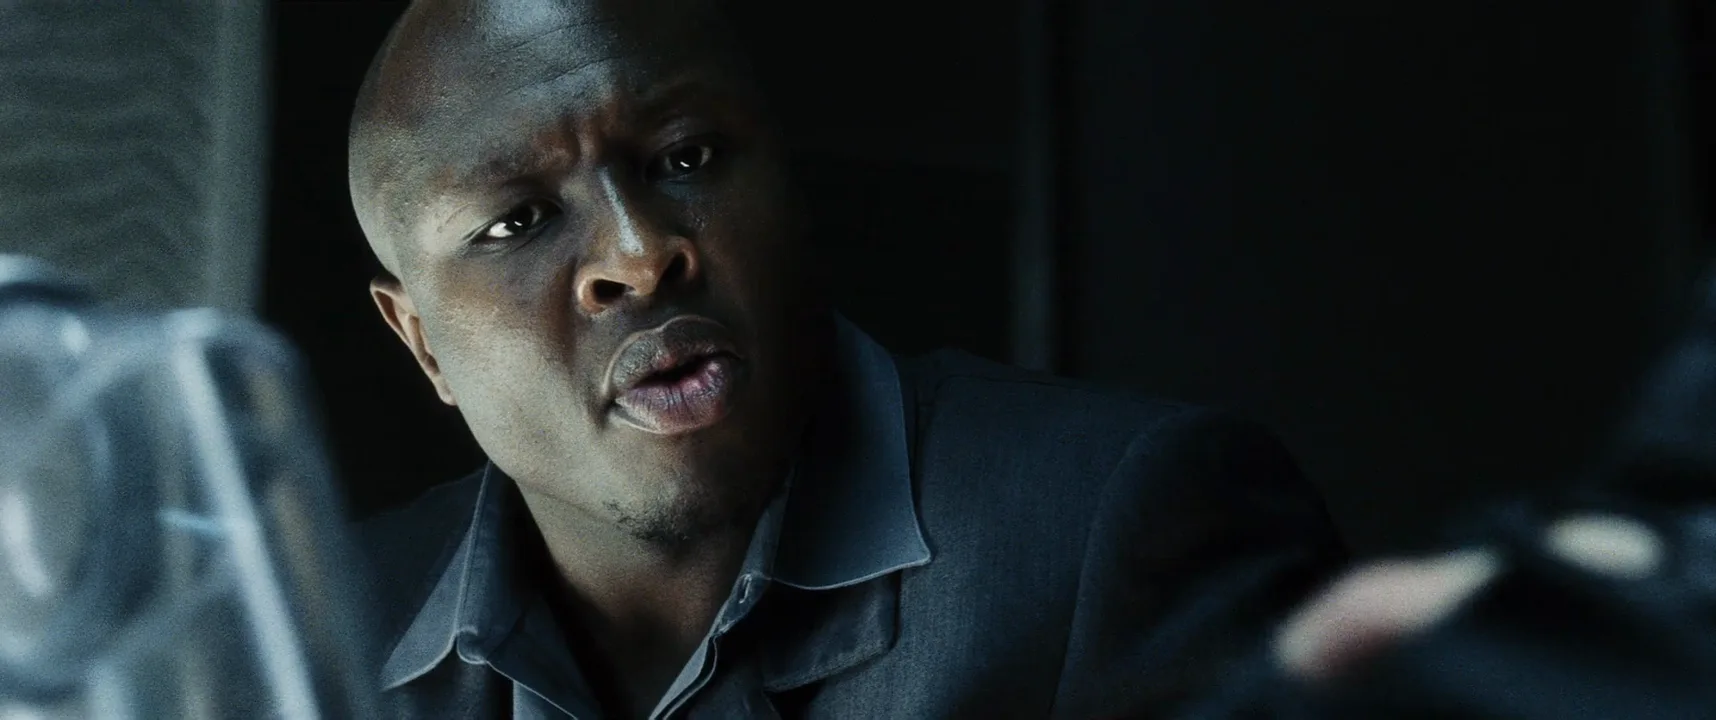
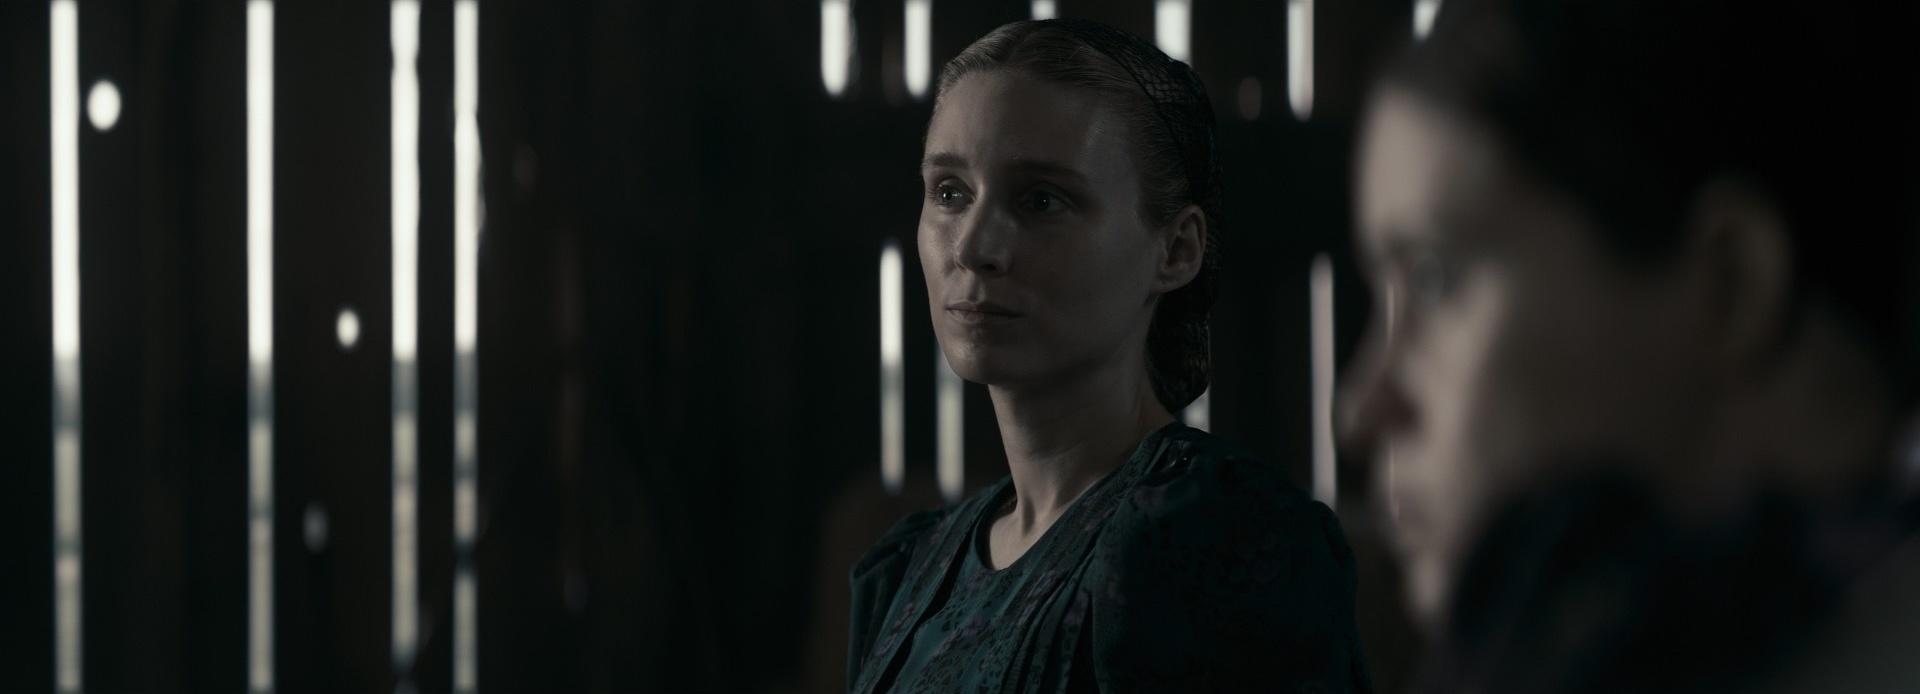
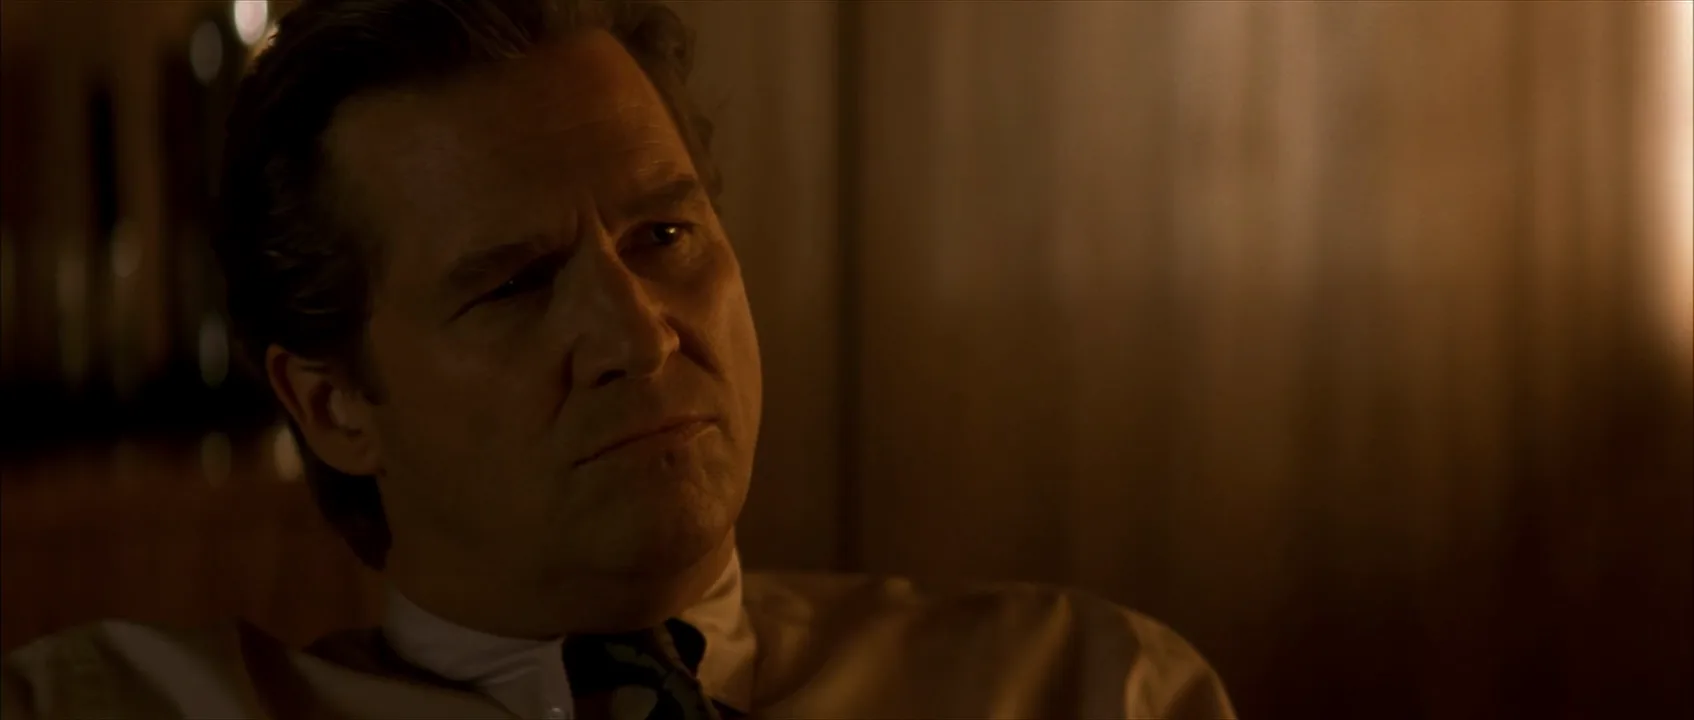
How to create a side lighting with AI
4 promptsModels read "side lighting" loosely and drift to a three-quarter portrait. Give them the geometry: source at 90°, eye height, which half of the face is dark. In FlashBoards, keep the frames above and your takes on one board and compare them. The fourth prompt re-shoots a real film shot from a text description alone, and the original plays next to the result so you can compare.
Cinematic close-up of a fictional man in his forties with a shaved head, a short salt-and-pepper beard, a crooked nose and a small scar through his left eyebrow, charcoal knit sweater, at a kitchen table at night. The only light is one bare hard lamp at arm's length beside his right ear, exactly 90 degrees to camera left, at a right angle to the lens axis, so its light travels sideways across his face from ear to ear. He looks into the lens, head turned a few degrees to frame right, away from the lamp. Split lighting: the half of his face nearer the lamp (frame left) is lit, raking across stubble and knit; the far half (frame right) is pitch black, the dividing line running straight down his forehead, nose, lips and chin. No fill, no front light, black background. 85mm lens, eye level.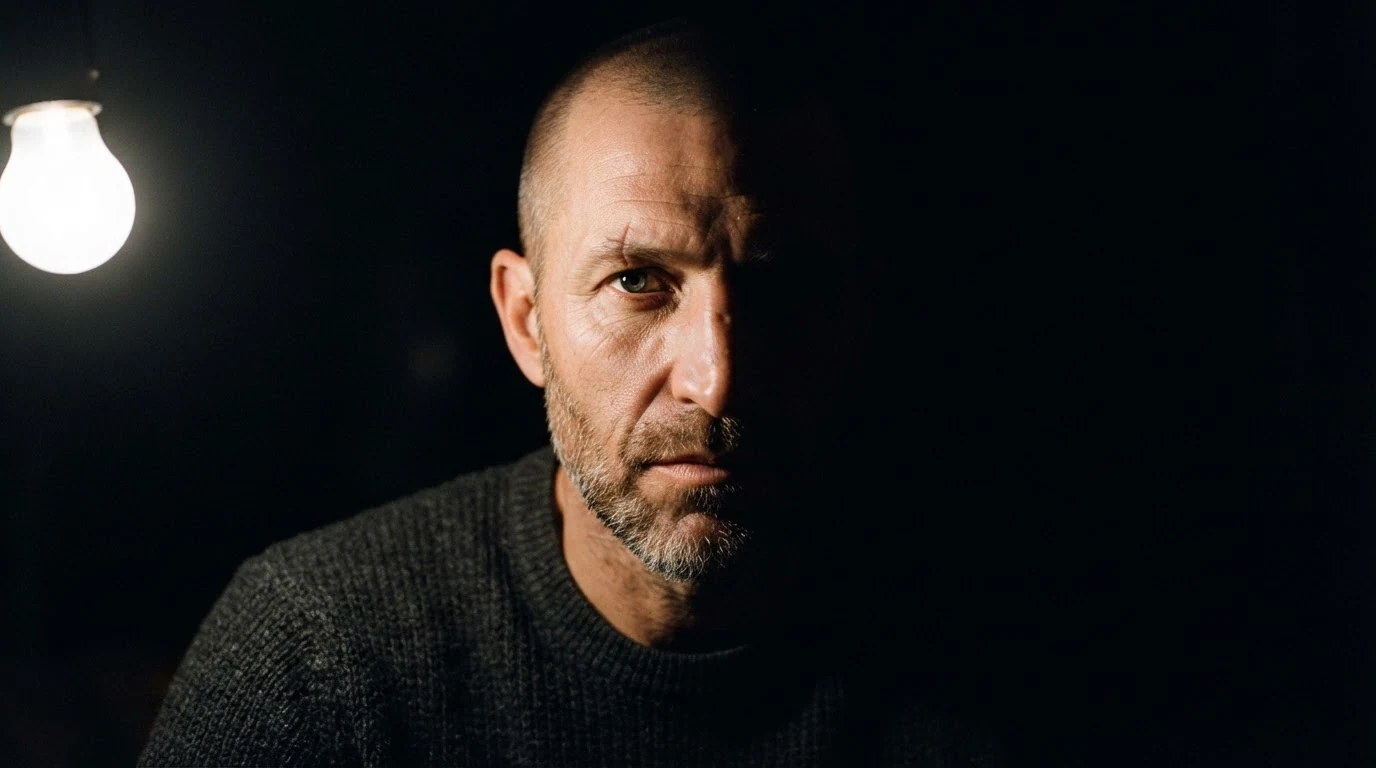
"Beside his right ear, exactly 90 degrees to camera left" places the key, and "its light travels sideways across his face" says what that angle does; "the only light" and "no fill, no front light" keep the far half dark. "He looks into the lens, head turned away from the lamp" matters most: a face turned into the light gets lit frontally and the split disappears.
Open FlashBoardsAnamorphic widescreen medium close-up of a fictional woman in her twenties with a long auburn braid, pale freckled skin and a thin silver lip ring, linen shirt, in a stone farmhouse room. Soft side lighting from an overcast window 90 degrees to the lens on frame right, her face turned toward the camera, right side softly lit, left side two stops darker, light grazing the cracked plaster wall. Muted green-gray palette, 50mm lens.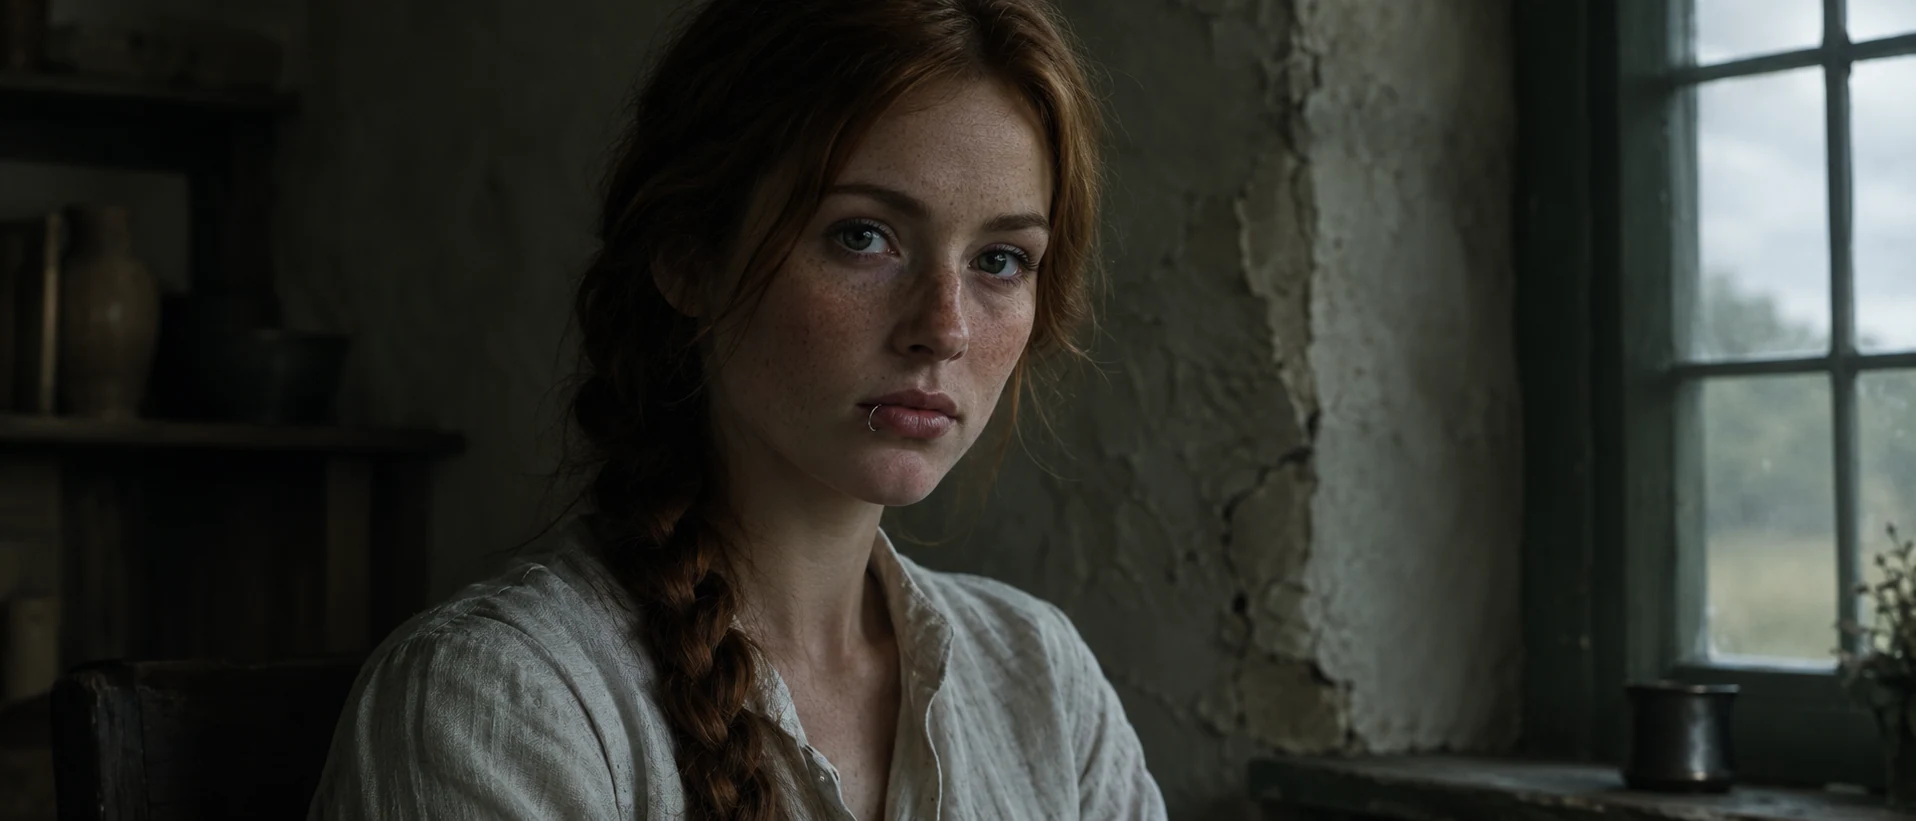
A soft window gives the division a gradual edge. "Face turned toward the camera" matters: without it, models turn the face to the window and light it frontally. "Two stops darker" asks for a gentler ratio.
Open FlashBoardsCamera: a slow, steady push-in from close-up to a tighter close-up on his eyes, starting at once. Action: he is already turning a small metal key between his fingers; halfway through he closes his hand around it, glances toward the lamp on the left and holds still. The light stays fixed: hard cool key from the left, left half of his face lit, right half in deep shadow.The action starts in the first words, so the shot is alive from frame one. The glance is small enough to keep the split, and restating the light helps hold it through the push-in.
Open FlashBoards{
"output": "Full-screen live-action film shot from The Railway Man (2013), one continuous locked-off shot from its very first frame, no cuts. Hard split side lighting: a single bare hard light out of frame at the far left, level with the faces and exactly side-on to the lens, throws its light straight across the frame from left to right. Each face is divided by a sharp line down the ridge of the nose: the half toward frame left is bright, every wrinkle raked with its own small shadow; the half toward frame right is in deep, near-black shadow. No fill and no front light: nothing lights the faces from the camera side. Interior, a dark room with a near-black brown background. Grainy 35mm anamorphic widescreen, warm amber highlights against brown-black shadows with a faint teal cast in the blacks.",
"characters": {
"S1": {
"name": "Finlay, played by Stellan Skarsgård",
"look": "man in his sixties, thinning white-grey hair swept back from a high forehead, heavy brow, deeply lined skin, dark overcoat over a white shirt and dark tie; in focus",
"voice": "silent in this shot"
},
"S2": {
"name": "Eric, played by Colin Firth",
"look": "man in his fifties, short dark brown hair, clean-shaven, cream shirt collar; seen only as a large blurred, out-of-focus profile close to the lens",
"voice": "quiet, low, flat English voice, almost a murmur"
}
},
"shots": [
{
"shot": 1,
"camera": "static camera, locked off, eye level, long lens, shallow focus: a two-shot close-up with S1 sharp in the left half of the frame and S2's out-of-focus profile filling the right third in the foreground, cut by the frame edge at forehead and neck; the framing and focus never change",
"action": [
"BEGINNING: alive from the first frame, S1 already leans in from the left, shoulders angled toward S2, head tipped a little down, face turned three-quarters toward frame right, away from the light; his eyes are raised under a furrowed brow and fixed on S2's face at frame right, mouth closed and turned down at the corners; the hard light from the left catches his temple, the frame-left cheek, his forehead and the ridge of his nose, and every crease of his forehead throws its own small shadow, while the frame-right half of his face, from the ridge of his nose to his jaw, and his eye on that side sit in deep shadow. S2's head is already in exact profile at frame right, blurred, facing frame left and looking down past S1, and it stays in that same profile from the first frame to the last; the front of his face catches the same hard light, his ear and the back of his head black",
"THEN: S1 holds the stare, his head easing up a fraction and then settling, no nod; S2's head sinks very slightly, his gaze still low",
"THEN: S2's lips part and he speaks quietly without turning his head; S1 stays completely still, eyes locked on S2, lips pressed together, brow still knotted",
"END: S2's mouth closes and both men hold still: S1's stare on S2, S2 in blurred profile looking down; the light never moves: the frame-left half of S1's face bright and textured, the frame-right half near-black, the dividing line straight down his nose"
],
"dialogue": [
{
"speaker": "S2",
"on_screen": true,
"when": "in the middle of the shot, after S1 has held his stare for a moment, never at the very start",
"delivery": "quiet, low, almost to himself",
"line": "<d>[English] imagining I'd found him.</d>"
}
]
}
],
"sound": {
"ambience": "the hush of a quiet room, faint breathing, a soft rustle of cloth",
"speech": "exactly these spoken phrases, each said once, in this order",
"never_spoken": "no narration and no voice-over: the descriptions, performance notes and step words of this prompt are never spoken aloud",
"music": "a film score under the scene, always below the voices: a low, sombre cello line over soft sustained strings",
"subtitles": "none"
}
}This remakes the locked-off two-shot from The Railway Man (2013), dir. Jonathan Teplitzky, DP Garry Phillips, where Finlay stares at Eric; the prompt carries over the single key from frame left, the shaded far side of Finlay's lined face, Eric's soft profile in the foreground and his one line.
The output line puts "a single bare hard light out of frame at the far left, level with the faces and exactly side-on to the lens" and says what that angle draws: a line down the ridge of each nose, the frame-left half raked with wrinkles, the frame-right half near-black. The first action step repeats the split on Finlay's face, the last says the light never moves, and Eric's one line is the film's own.
Common mistakes
- Three-quarter instead of side. State "90 degrees to camera left" and where the shadow line falls.
- Fill creeping in. Write "no fill" or a ratio.
- Face turned into the light. Say which way the face points.
- Split lost in video. Keep head turns small and repeat the light setup.
Keep the reference frames, prompts and every generated take side by side — images and video in one canvas.
FAQ
4 questionsWhat is side lighting in film?
Side lighting is when the main light hits the subject from about 90° to one side rather than from near the camera. One half of the face is lit, the other falls into shadow, and grazing light brings out texture. It suggests tension, secrecy and inner conflict.
What is split lighting?
Split lighting is the strictest form of side lighting: the key sits exactly at 90° and at eye level, so the line between light and shadow runs down the middle of the face and the far eye stays dark. It is stylized and best for short, revealing moments.
What is the difference between side lighting and Rembrandt lighting?
Rembrandt lighting places the key about 45° to the side and above the eyes, leaving a small triangle of light on the shadow cheek. Side lighting moves the key to about 90°, so the triangle disappears and the far cheek goes dark, sometimes hiding one eye.
How do you set up side lighting?
Put one light level with the subject's head, 1–2 m away, at a right angle to the camera–subject line, and adjust until the shadow line runs down the nose. Use a hard source for texture or a diffused one for a soft edge, then shape the dark side with a bounce or negative fill.
Related terms
5- Rembrandt LightingLighting
Rembrandt lighting places the key high and about 45° to one side, so the far cheek falls into shadow except for a small triangle of light under the eye — a moody, painterly portrait look named after the Dutch painter.
- Key LightLighting
The key light is the main light on a subject: it sets the direction, hardness and color of the illumination, and every other source — fill, back, practicals — is balanced against it.
- ChiaroscuroLighting
Chiaroscuro, borrowed from Renaissance and Baroque painting, is dramatic modelling with strong light and deep shadow — usually one hard side or top source carving faces out of darkness — the backbone of German Expressionism and film noir.
- Hard LightLighting
Hard light comes from a small or distant source — a bare bulb, an open fresnel, the midday sun — and throws crisp, sharp-edged shadows with an abrupt jump from light to dark.
- Top LightingLighting
Top lighting comes from directly overhead, lighting heads and shoulders while sinking the eyes into dark sockets — as Gordon Willis did with Marlon Brando in The Godfather; it suggests midday sun, interrogation rooms or characters we cannot read.
Further reading
Blain Brown, Motion Picture and Video Lighting (Focal Press). Kris Malkiewicz, Film Lighting (Touchstone).