 FlashBoards Learn
Lighting · Film language
Fill Light
Also called: fill, fill lighting
Fill light is a softer, weaker source placed on the side opposite the key light to lift the shadows the key creates. It never sets the direction of the light; it sets how deep the shadows go. The key-to-fill ratio decides whether a face reads open and bright or moody and sculpted.
- What it does
- Controls how dark the shadow side of a face gets, and with it the contrast and mood of the shot.
- Use it when
- The key light alone leaves the shadow side too dark for the story you are telling, or the actor's eyes disappear.
- Watch out
- Too much fill flattens the face and erases the key's direction; a fill that casts its own shadow or second catchlight gives itself away.
- Try this prompt
Close-up, soft warm key from camera left, gentle bounce fill from the right, shadow side two stops darker with skin detail, 4:1 lighting ratio
What is fill light?
In a classic setup every light on a face has one job. The key light decides where the light comes from, how hard it is and what color it carries. The backlight or rim light separates the head from the background. The fill light has the quietest job of the three: it reaches into the shadows the key leaves behind and decides how much detail survives there.
Three properties define a fill:
- It is weaker than the key. A fill that matches the key in brightness stops being a fill; you now have two keys and a face with no modeling.
- It is softer than the key. Fill usually comes from a large source — a bounce board, a book light, a big diffusion frame — so it adds brightness without adding a second set of shadows.
- It sits on the shadow side, near the camera. Placed close to the lens axis, it lifts everything the camera can see without creating a new direction of light.
Fill is not always a lamp. The white wall opposite a window, a sunlit sidewalk, a table covered in paper, a white shirt under a chin — all of them bounce light back into the shadow side. On many sets the cinematographer's work with fill is as much about removing it as adding it. The measure of all of this is the lighting ratio, the relationship between the brightness of the key side and the shadow side of the face. It decides the contrast of a portrait more than any other setting in film lighting.
The key-to-fill ratio: how much fill is enough?
Cinematographers describe fill in ratios or in stops. The convention: the lit side of the face receives key plus fill, the shadow side receives fill only, and the ratio compares the two. Each doubling is one stop.
| Ratio | Difference in stops | How the face reads | Typical use | |---|---|---|---| | 1:1 | 0 | Flat, shapeless, no clear light direction | Beauty and product shots, some commercials | | 2:1 | 1 | Open, bright, friendly; shape is visible but gentle | Comedy, sitcoms, high-key lighting | | 4:1 | 2 | Modeled and natural; the classic drama ratio | Most dialogue scenes in features | | 8:1 | 3 | Moody, sculpted; the shadow side reads dark but not black | Thrillers, crime, night interiors | | 16:1 and beyond | 4+ | Half the face falls into near black | Noir, horror, low-key lighting, chiaroscuro |
The ratio is a creative decision, not a technical one. A comedy lit at 8:1 feels ominous; a noir lit at 2:1 feels like a daytime soap. Genre, time of day, the character's state of mind and the skin tone of the actor all push the number up or down. A darker complexion reflects less light, so the same ratio will read as more contrast, and the fill often needs to come up to keep the eyes and the shadow-side cheek readable.
The ratio also has to survive the grade: many cinematographers light with slightly more fill than the final image shows and let the colorist bring the shadows down, rather than crush detail that cannot be recovered.
Why do filmmakers use fill light?
To set the mood without moving the key. Direction usually comes from the story world — a window, a lamp, the sun. Fill is the knob left free for emotion. With the key untouched, bringing the fill down two stops turns a friendly interview into an interrogation.
To keep the eyes alive. The most common use of fill is simply making sure the audience can read a performance. A key from high and to the side leaves the far eye socket in shadow; a touch of fill brings back the eye and its catchlight without flattening the cheekbones.
To mark a genre. Sitcoms, musicals and most comedies live around 2:1 because comedy needs readable faces from every angle and at every moment. Crime films and thrillers push the ratio up. Gordon Willis's photography of The Godfather (1972) is the famous extreme: top light with so little fill that Marlon Brando's eyes sit in darkness, which made the characters feel unknowable.
To match shots in coverage. The shadow side in one angle becomes the lit side of the reverse; fill keeps contrast consistent across cuts so a face does not jump from moody to flat.
To track a character's arc. Letting the fill fall away scene by scene darkens a face as the character grows more isolated or dangerous.
How to set a fill light on set
1. Light the key first, with the fill off. Decide how much of the shadow side you want to see, then bring in the fill — a fill set before the key almost always ends up too bright.
2. Choose a large, soft source. The classics:
- a bounce board — foam core, a 4×4 poly or an 8×8 frame of Ultrabounce — hit by a lamp or by the key's own spill (bounce lighting covers the technique in depth);
- a book light — a lamp bounced into a white surface and then pushed through a diffusion frame for an even gentler wrap;
- an LED panel through heavy diffusion, dimmed;
- outdoors, a reflector (white for subtle, silver for punchy, gold for a warm sunset lift) or simply a white wall off camera.
A soft fill does not cast a readable shadow of its own, which is what lets it stay invisible. The mechanics of why large sources behave this way are covered in soft light.
3. Place it near the lens, on the shadow side. The closer the fill is to the camera axis, the fewer extra shadows it creates,. Height is usually around lens height or slightly above. A fill placed far to the side becomes a second key and splits the face.
4. Set the ratio with a meter or a monitor. With an incident meter, read the key side and the shadow side and compare the stops. On a digital camera, false color or a waveform shows the gap: a 4:1 ratio puts the shadow cheek roughly two stops below the lit one.
5. Control it with distance, dimmers and nets. Moving a bounce board a meter back drops the fill noticeably; a single or double net over the lamp takes it down half a stop or a stop without changing color.
6. Check the eyes. A fill close to the lens can add a second, weaker catchlight. Some cinematographers like it; many prefer a single catchlight from the key and cut or flag the fill so it does not show in the eyes.
7. Use negative fill when there is too much. On location white walls, bright floors and sunny windows often over-fill the room. A black flag, a floppy or a large solid on the shadow side absorbs that bounce and gives the face its shape back.
Fill light vs. key light: what is the difference?
The two are defined by their relationship, not by the lamp. Any fixture can be a key or a fill; the job changes with where it sits and how bright it is.
| | Key light | Fill light | |---|---|---| | Job | Sets the direction, hardness and color of the light | Sets how dark the shadows become | | Brightness | The brightest source on the subject | Weaker than the key, measured as a ratio | | Quality | Can be hard or soft | Almost always soft | | Placement | To one side, usually 30–60° off the lens axis, often motivated by a window or lamp | On the opposite side, near the lens axis | | Shadows | Creates the main shadow pattern (loop, Rembrandt, split) | Should add no visible shadow of its own | | If you remove it | The face loses its light direction and story motivation | The shadow side drops toward black and contrast climbs |
A quick test on set: switch each lamp off in turn. If the image loses its direction, that lamp was the key. If the image keeps its direction and just gets darker on one side, it was the fill.
In soft, naturalistic lighting the line blurs: a big window can wrap around the face and act as key and fill at once, with the ratio controlled only by bounce and negative fill in the room.
Types of fill: bounce, ambient, on-axis and practical
Bounce fill — a board or wall reflecting part of the key; it carries the key's color, so it looks the most natural.
Ambient fill — a soft, even level for the whole set from an overhead diffusion frame, a lit ceiling or a space light. See ambient light.
On-axis fill — a ring light or small LED panel right at the lens that fills exactly what the camera sees; popular for close-ups and handheld work.
Practical fill — a desk lamp or a TV screen on the shadow side doing the fill's job inside the scene as a practical light.
Colored fill — a cool fill against a warm key is the classic night look; the color difference adds separation even at a low brightness ratio.
Fill Light examples in film
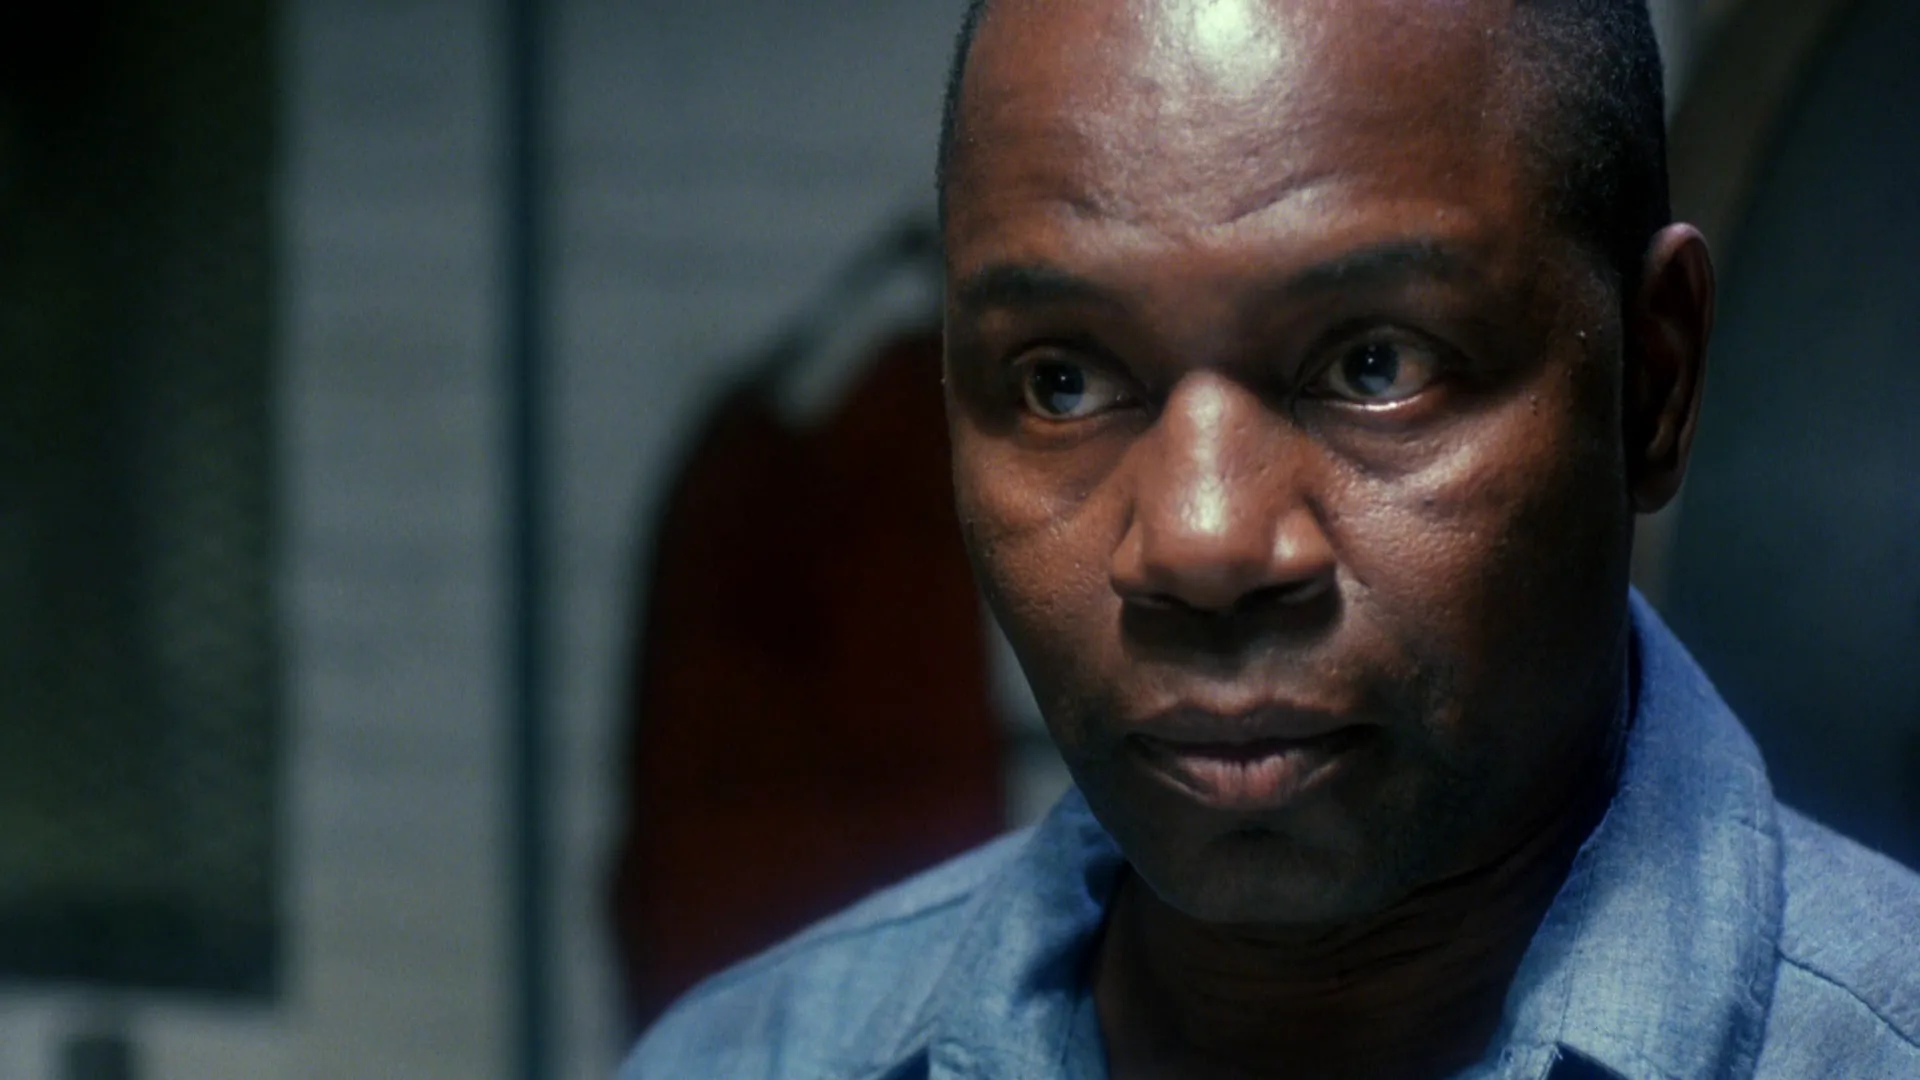
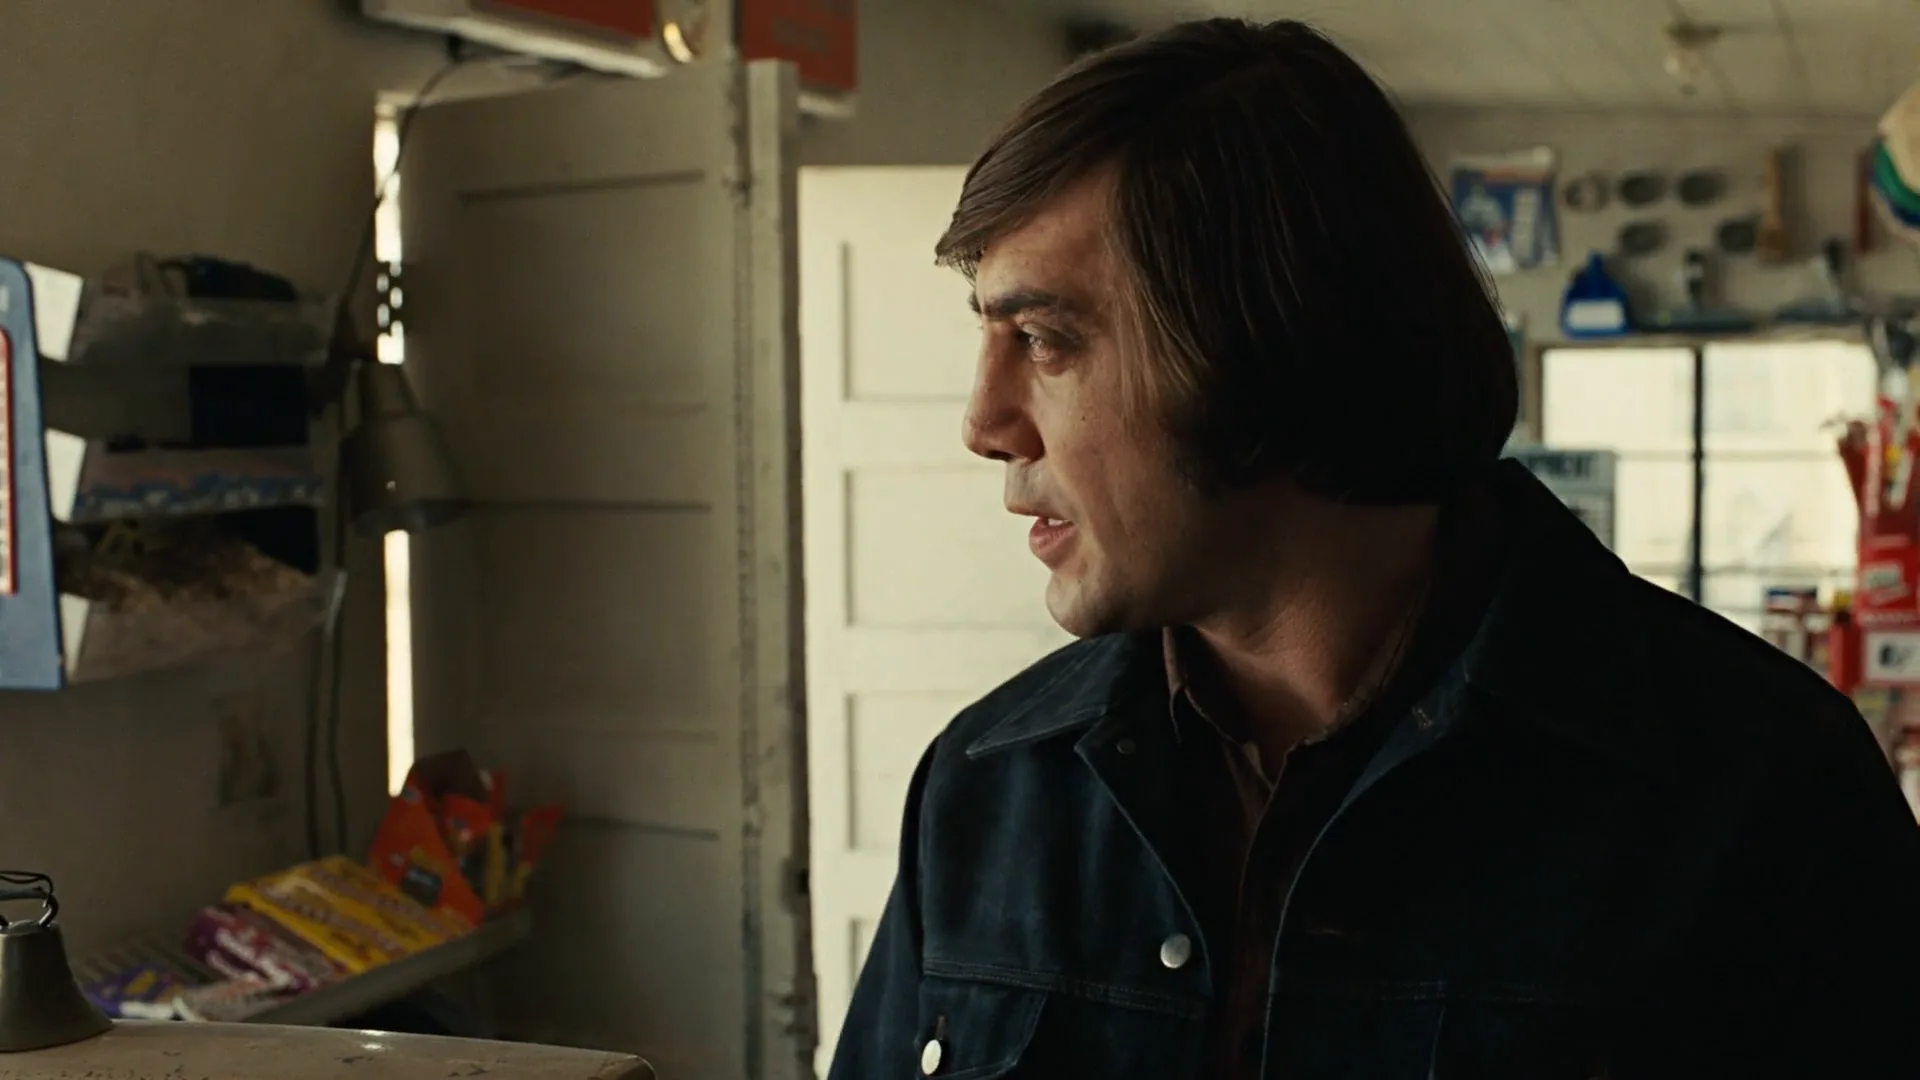
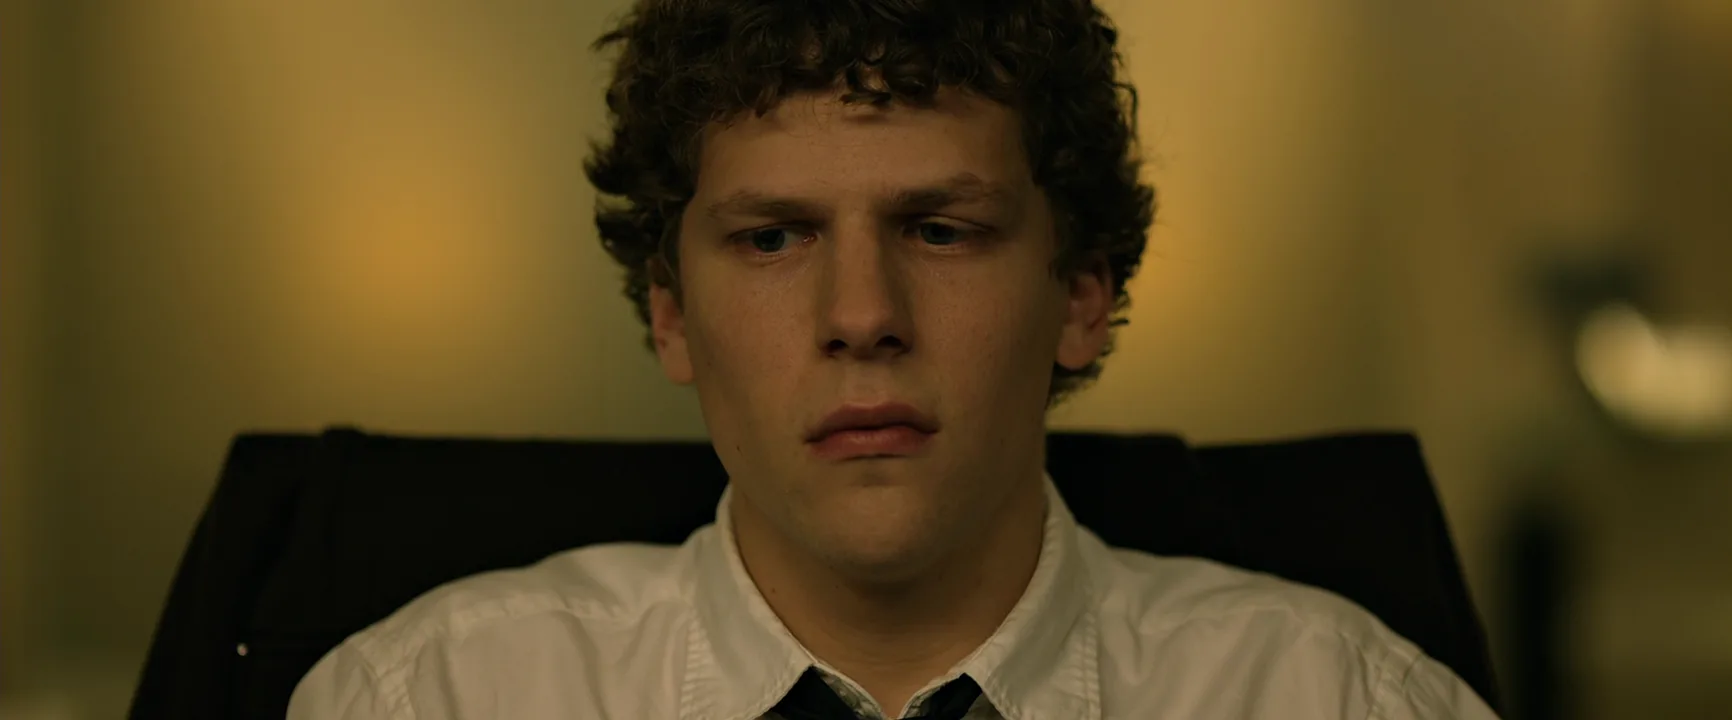
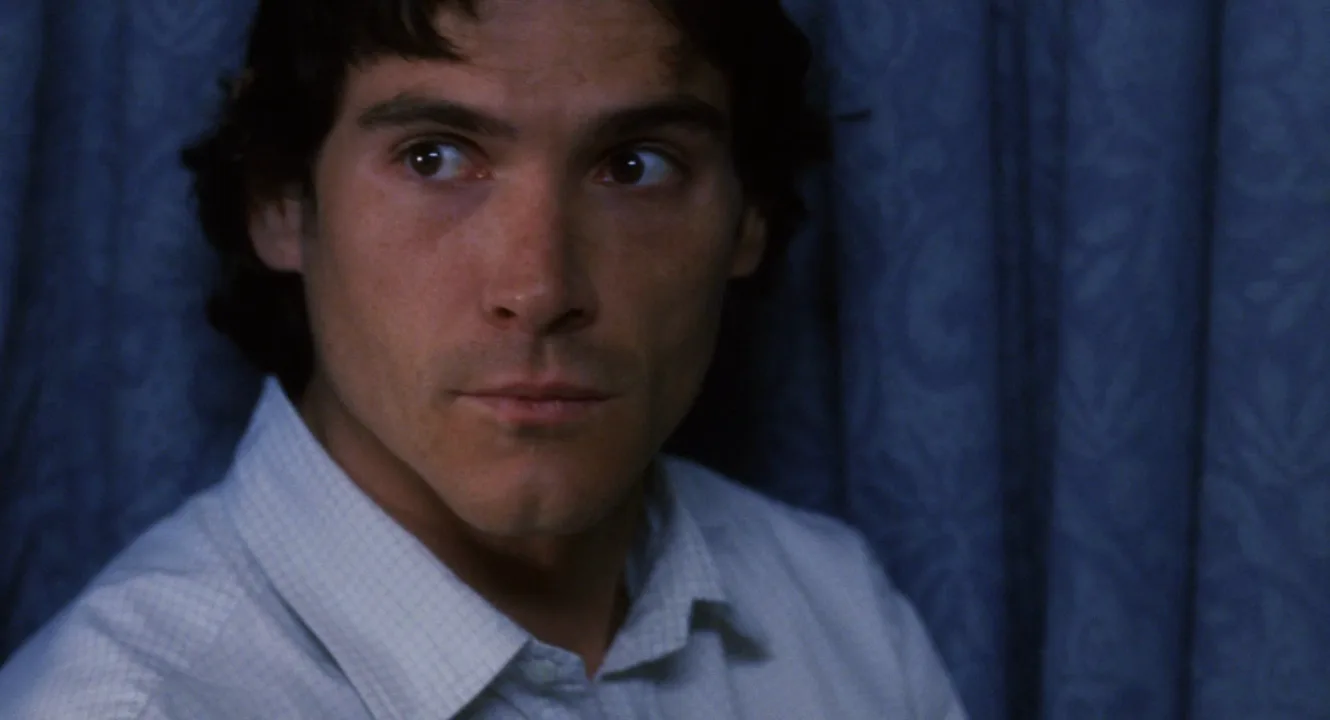
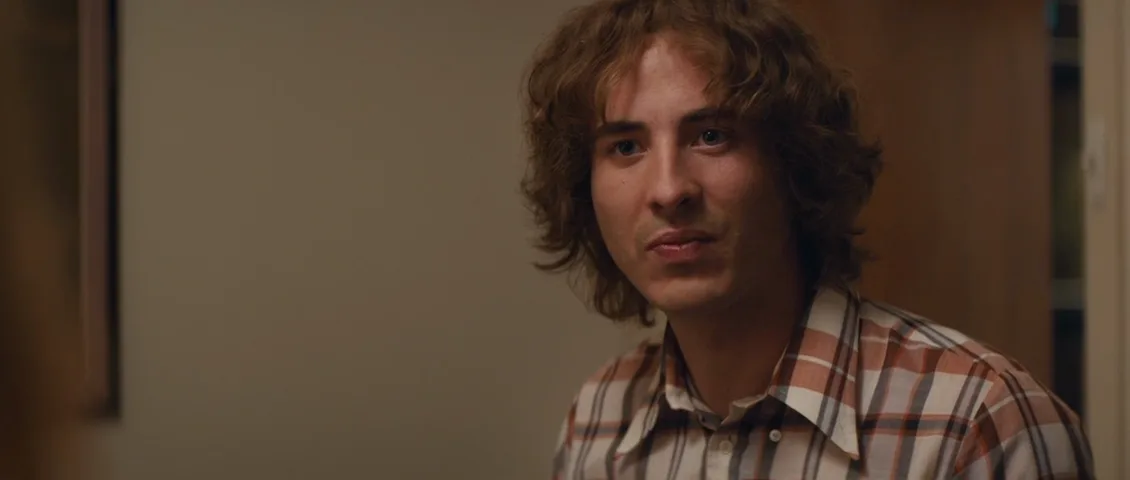
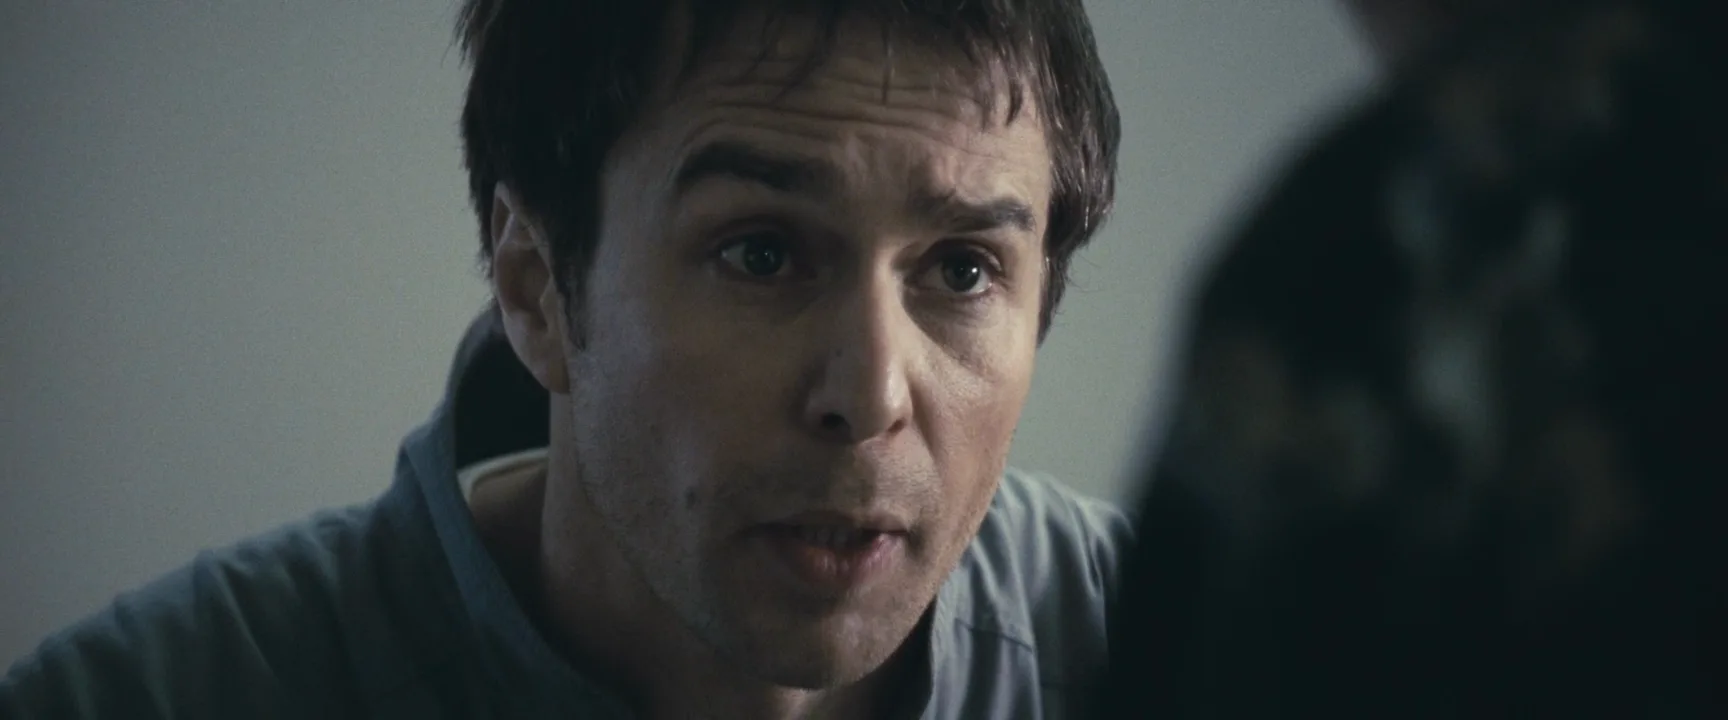
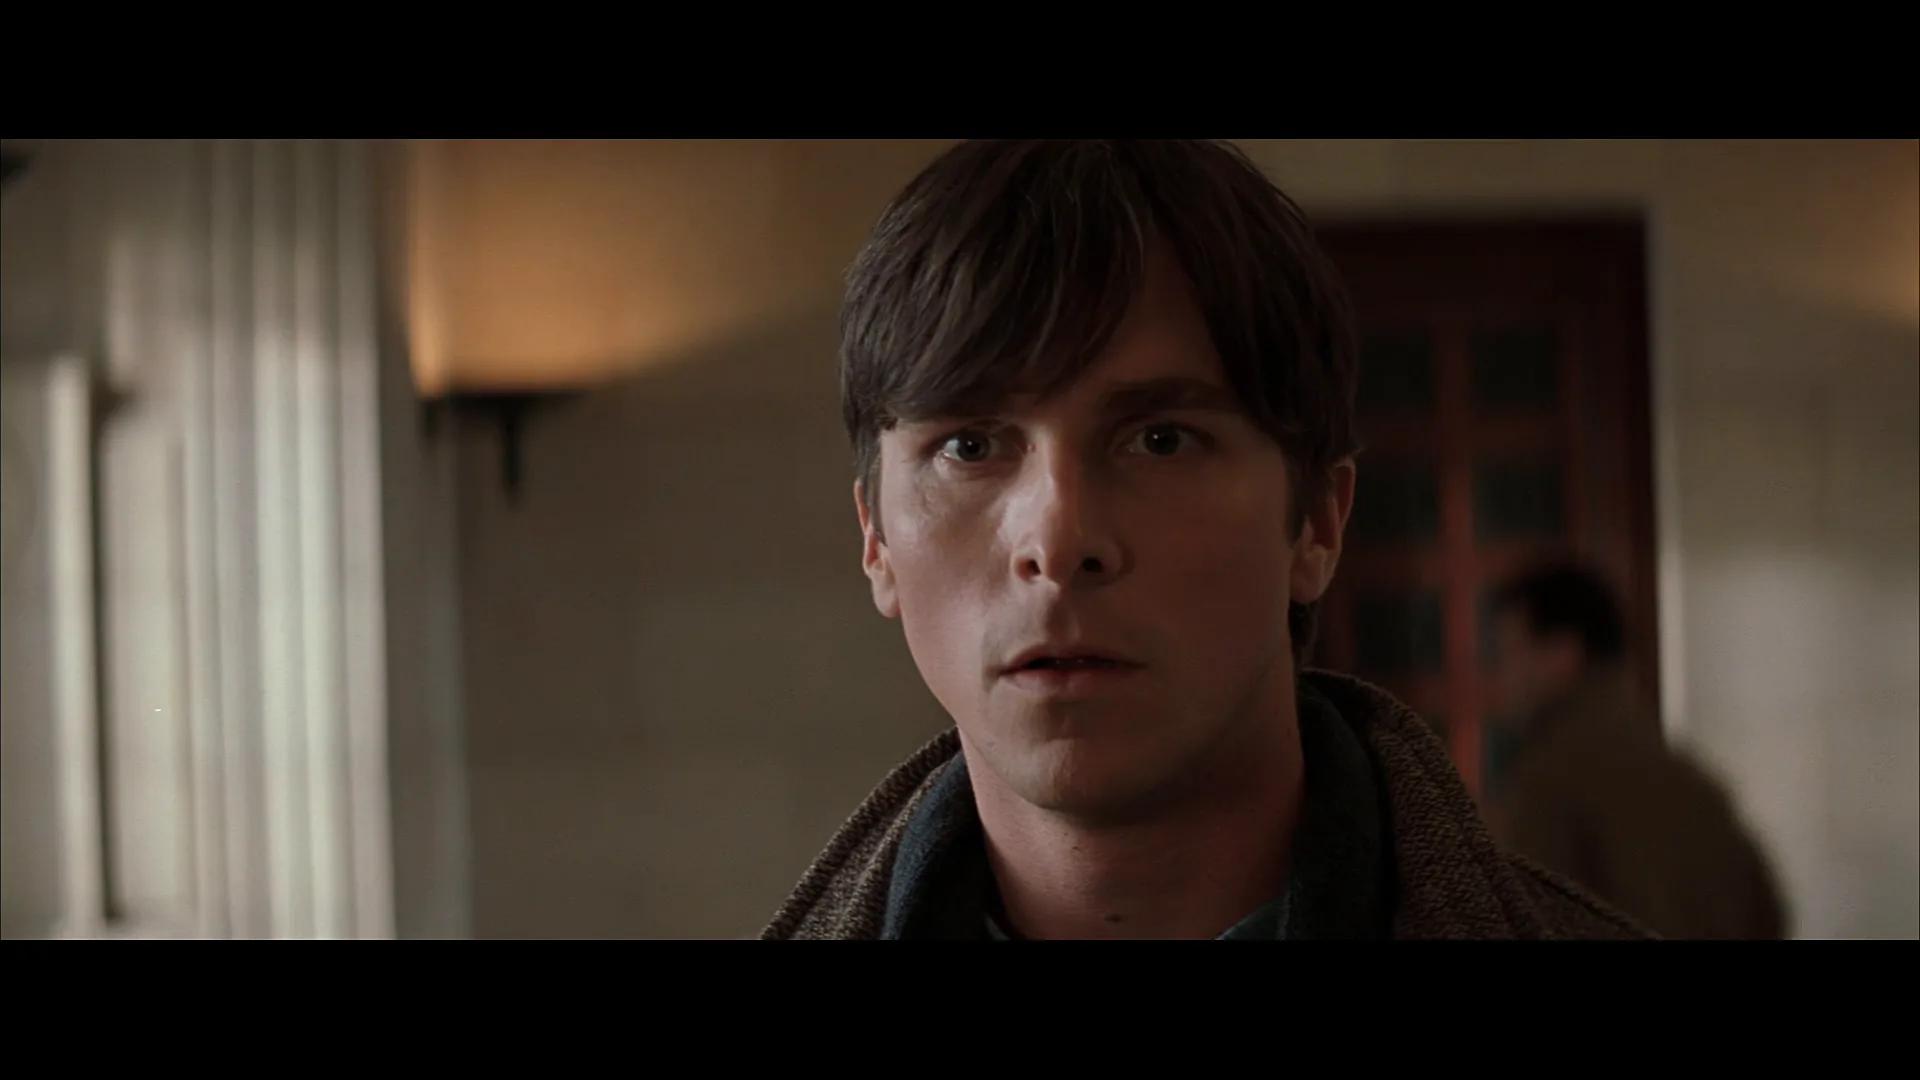
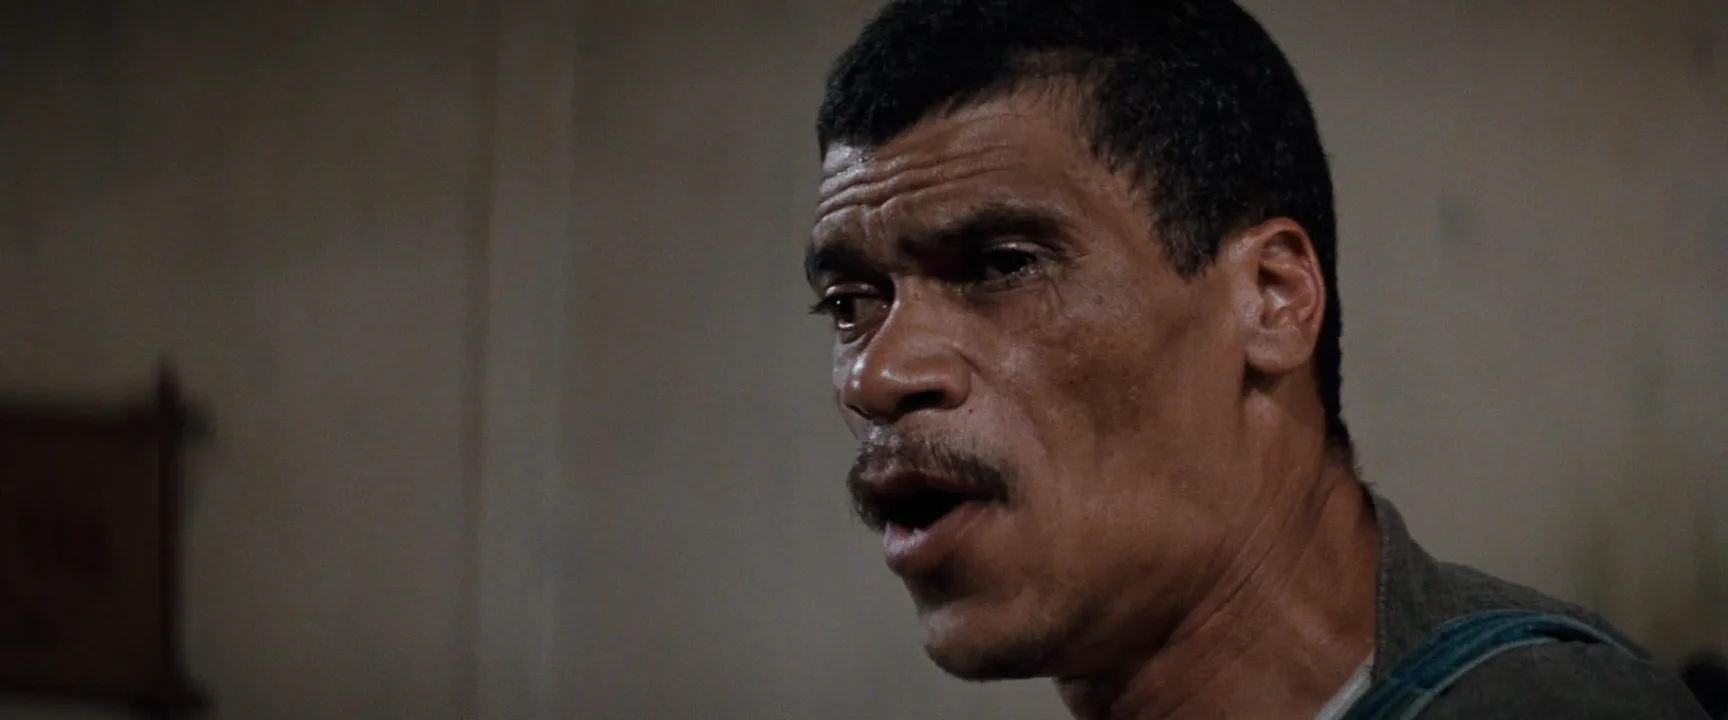
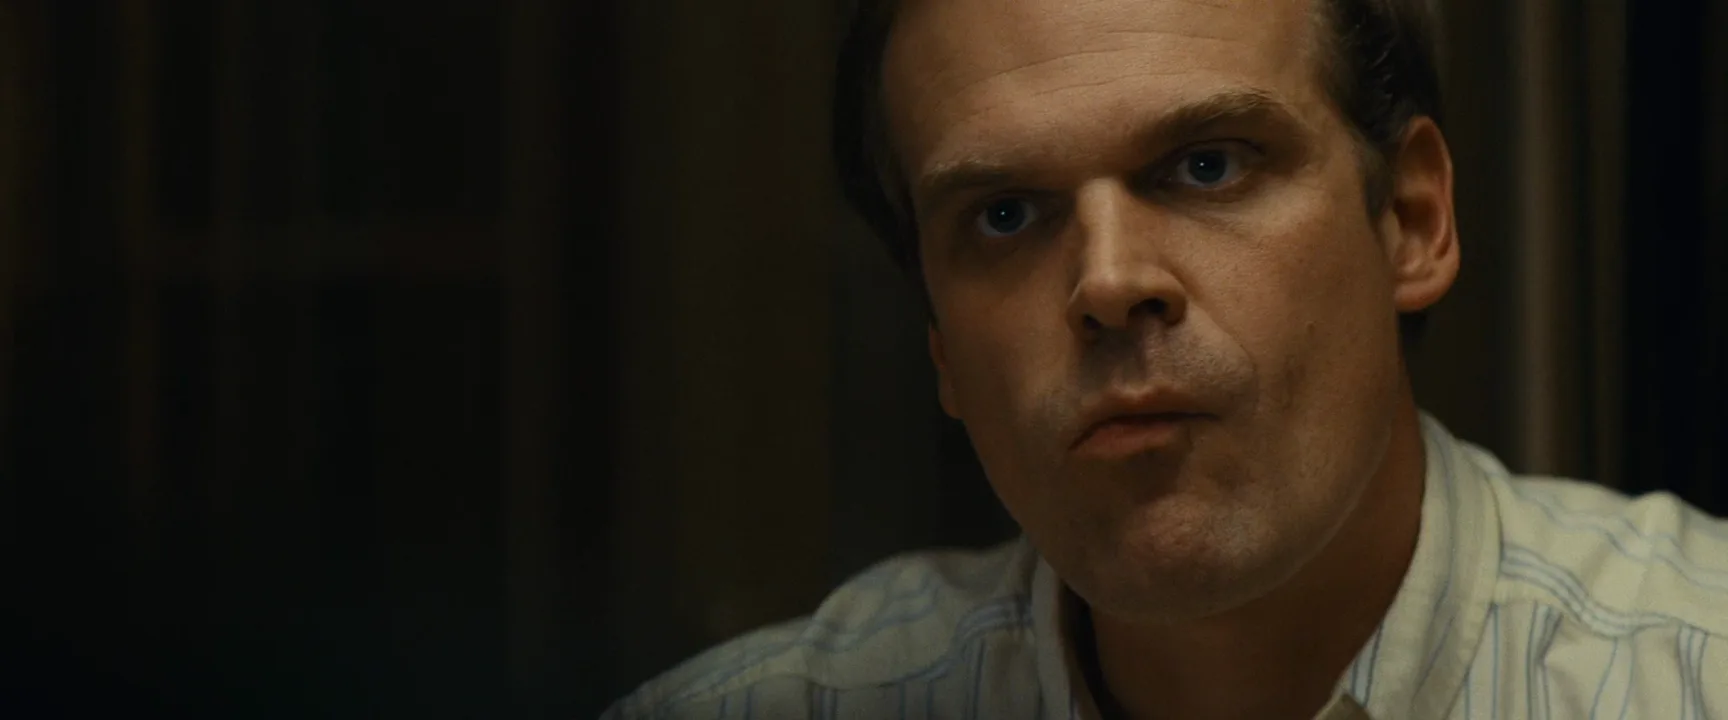
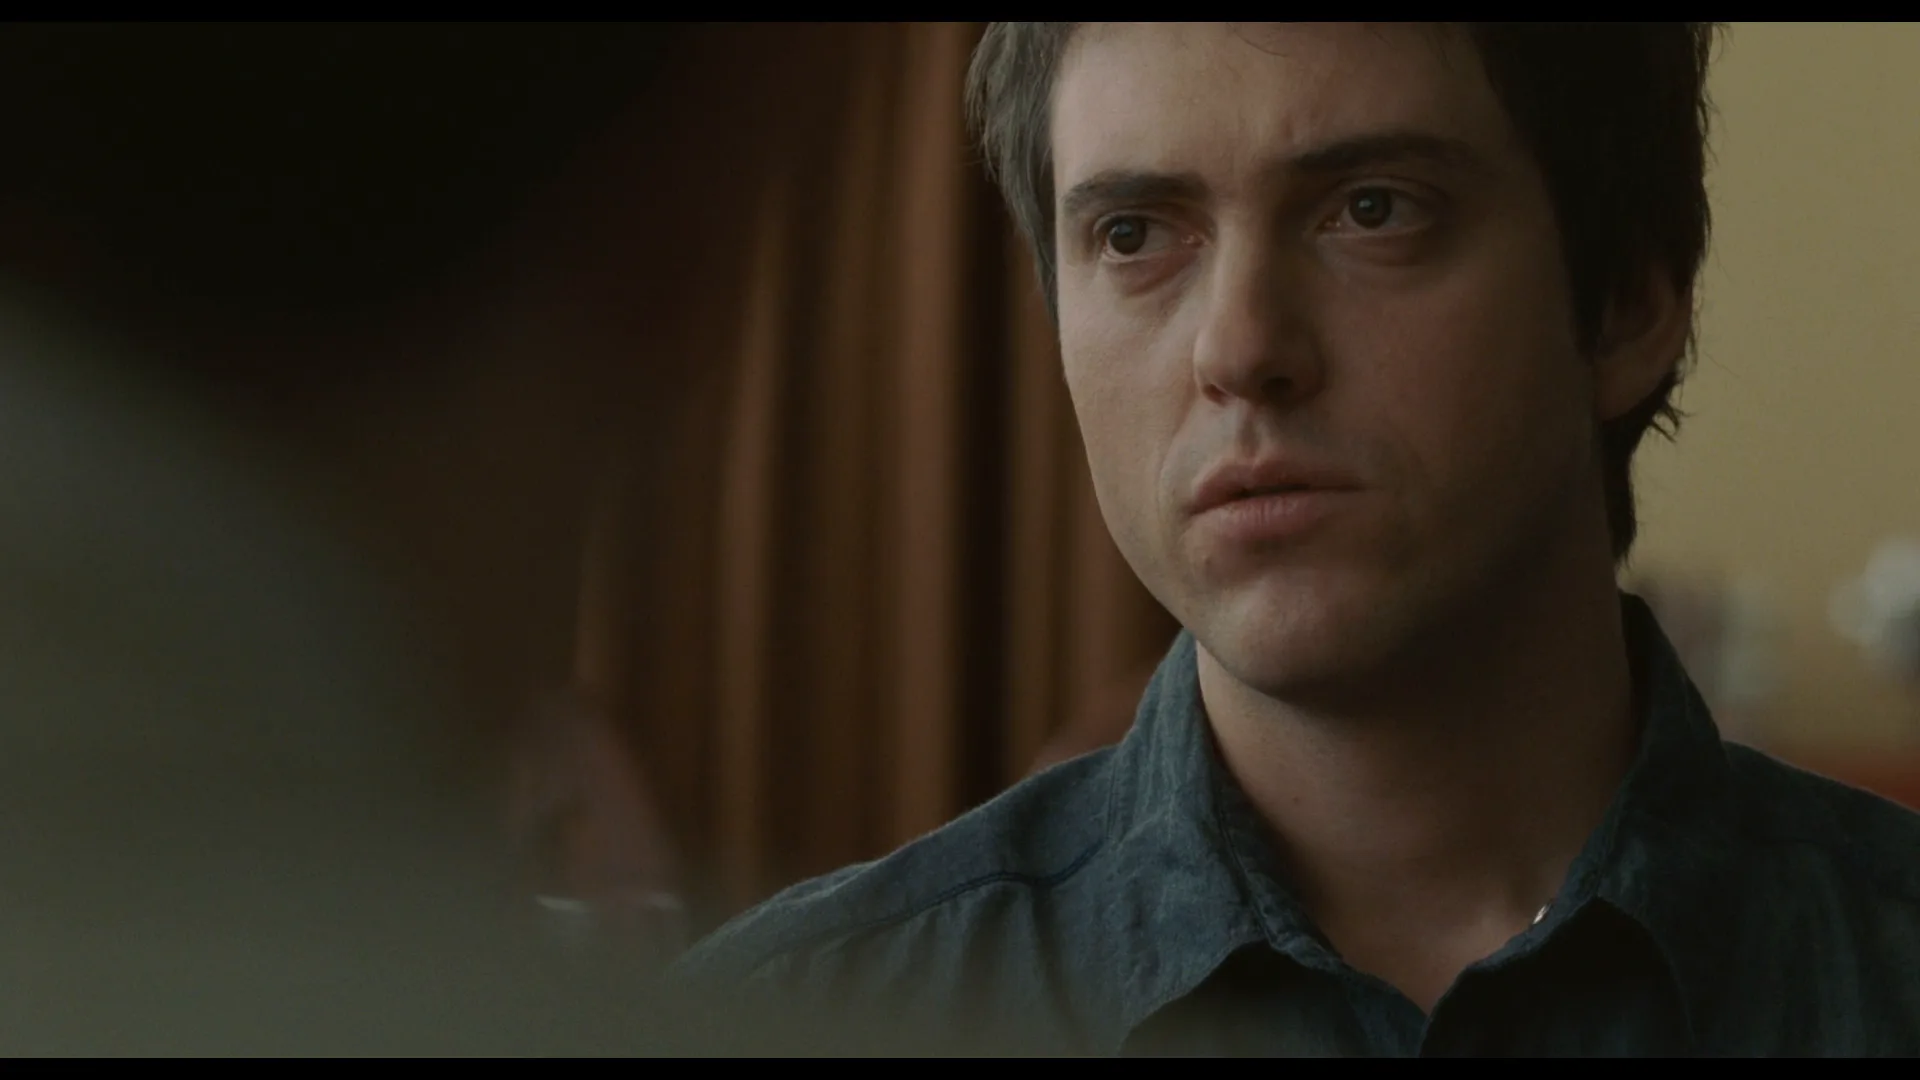
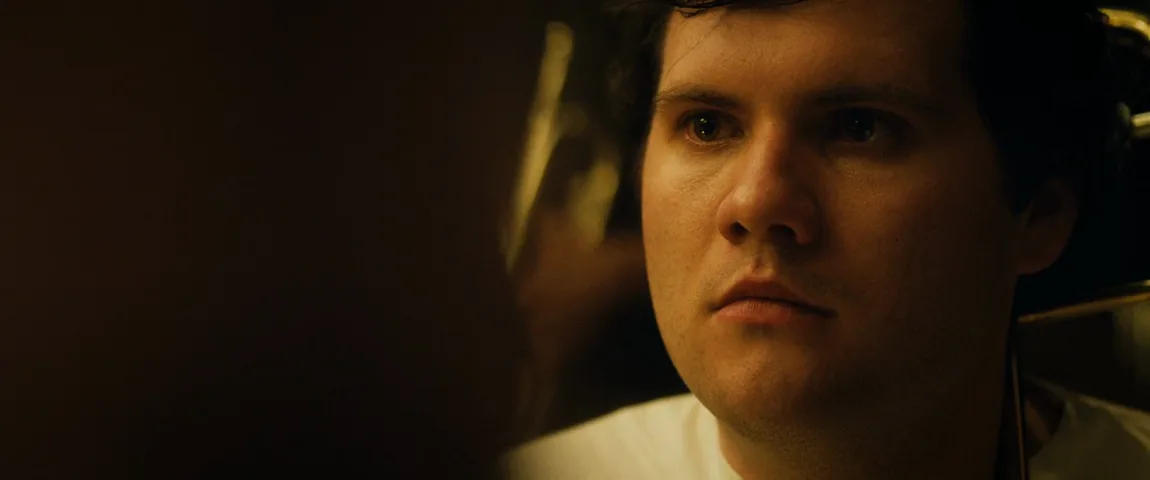
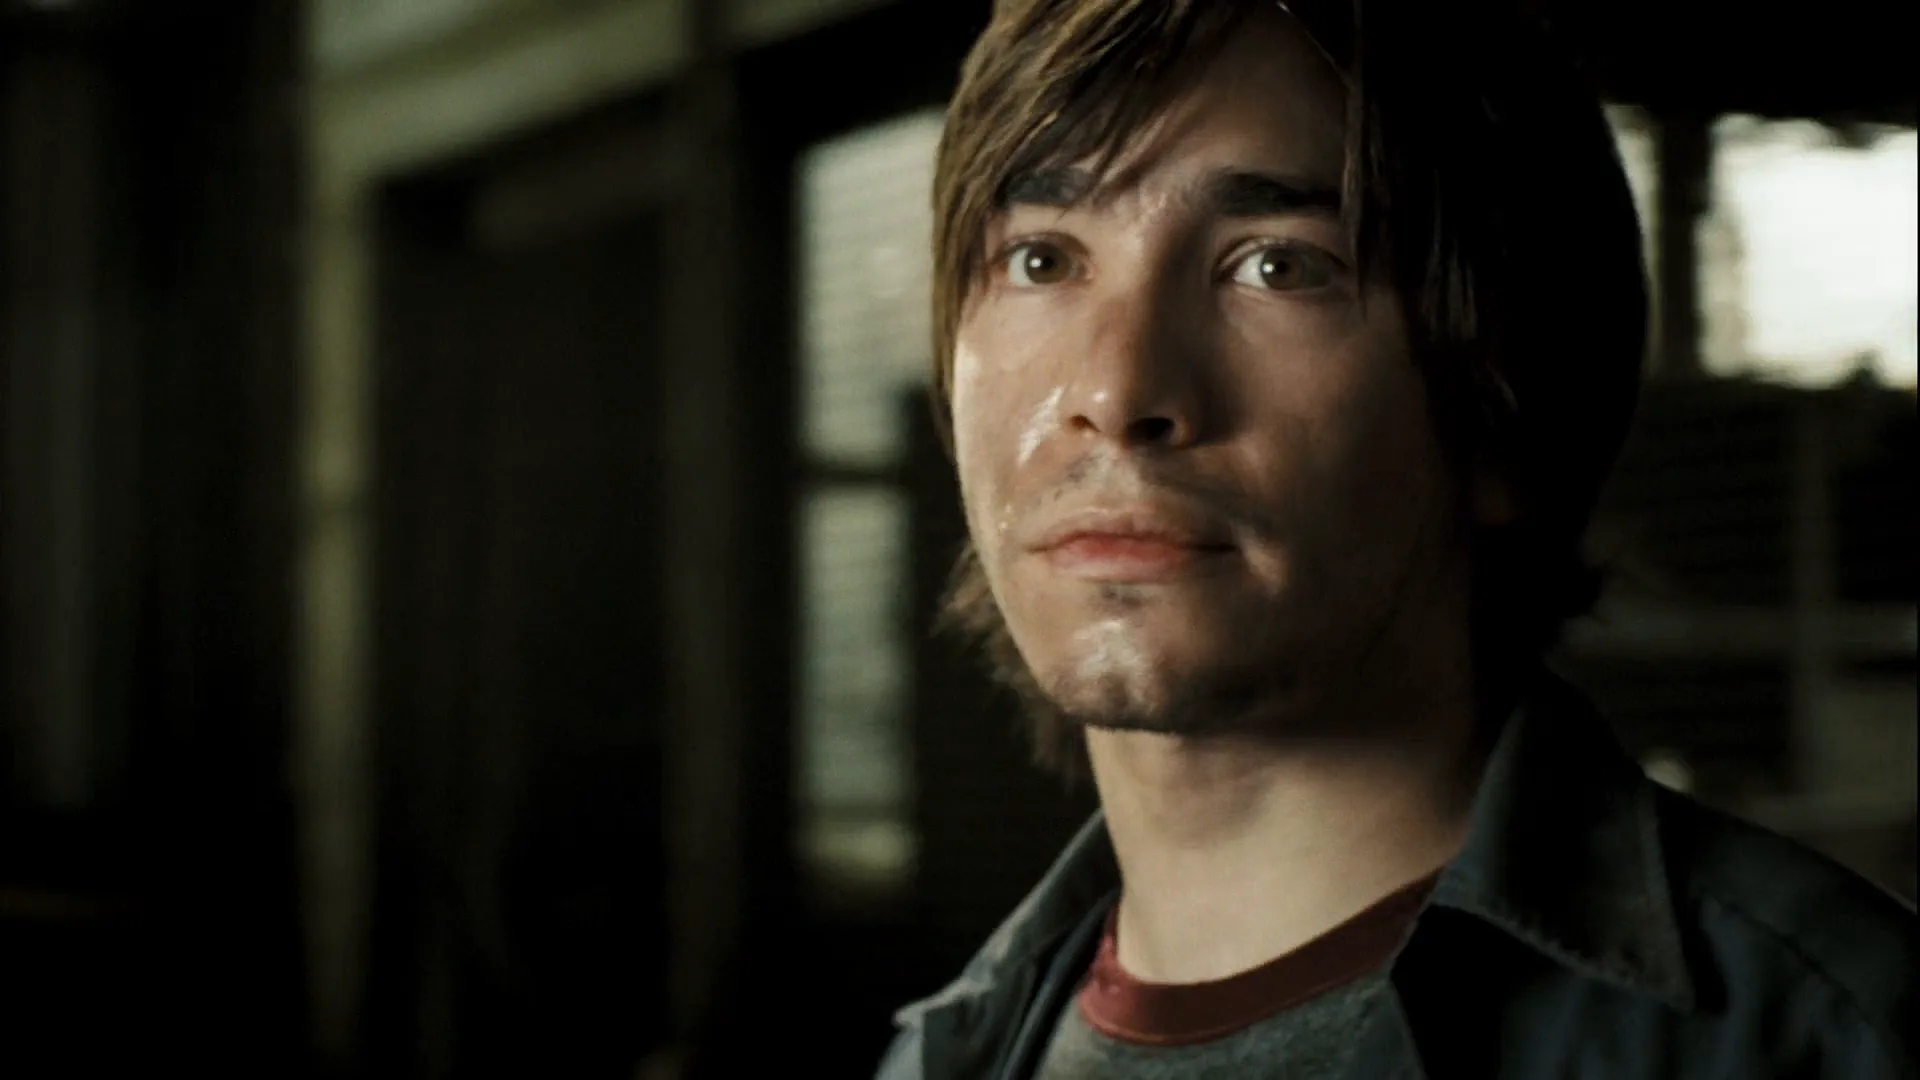
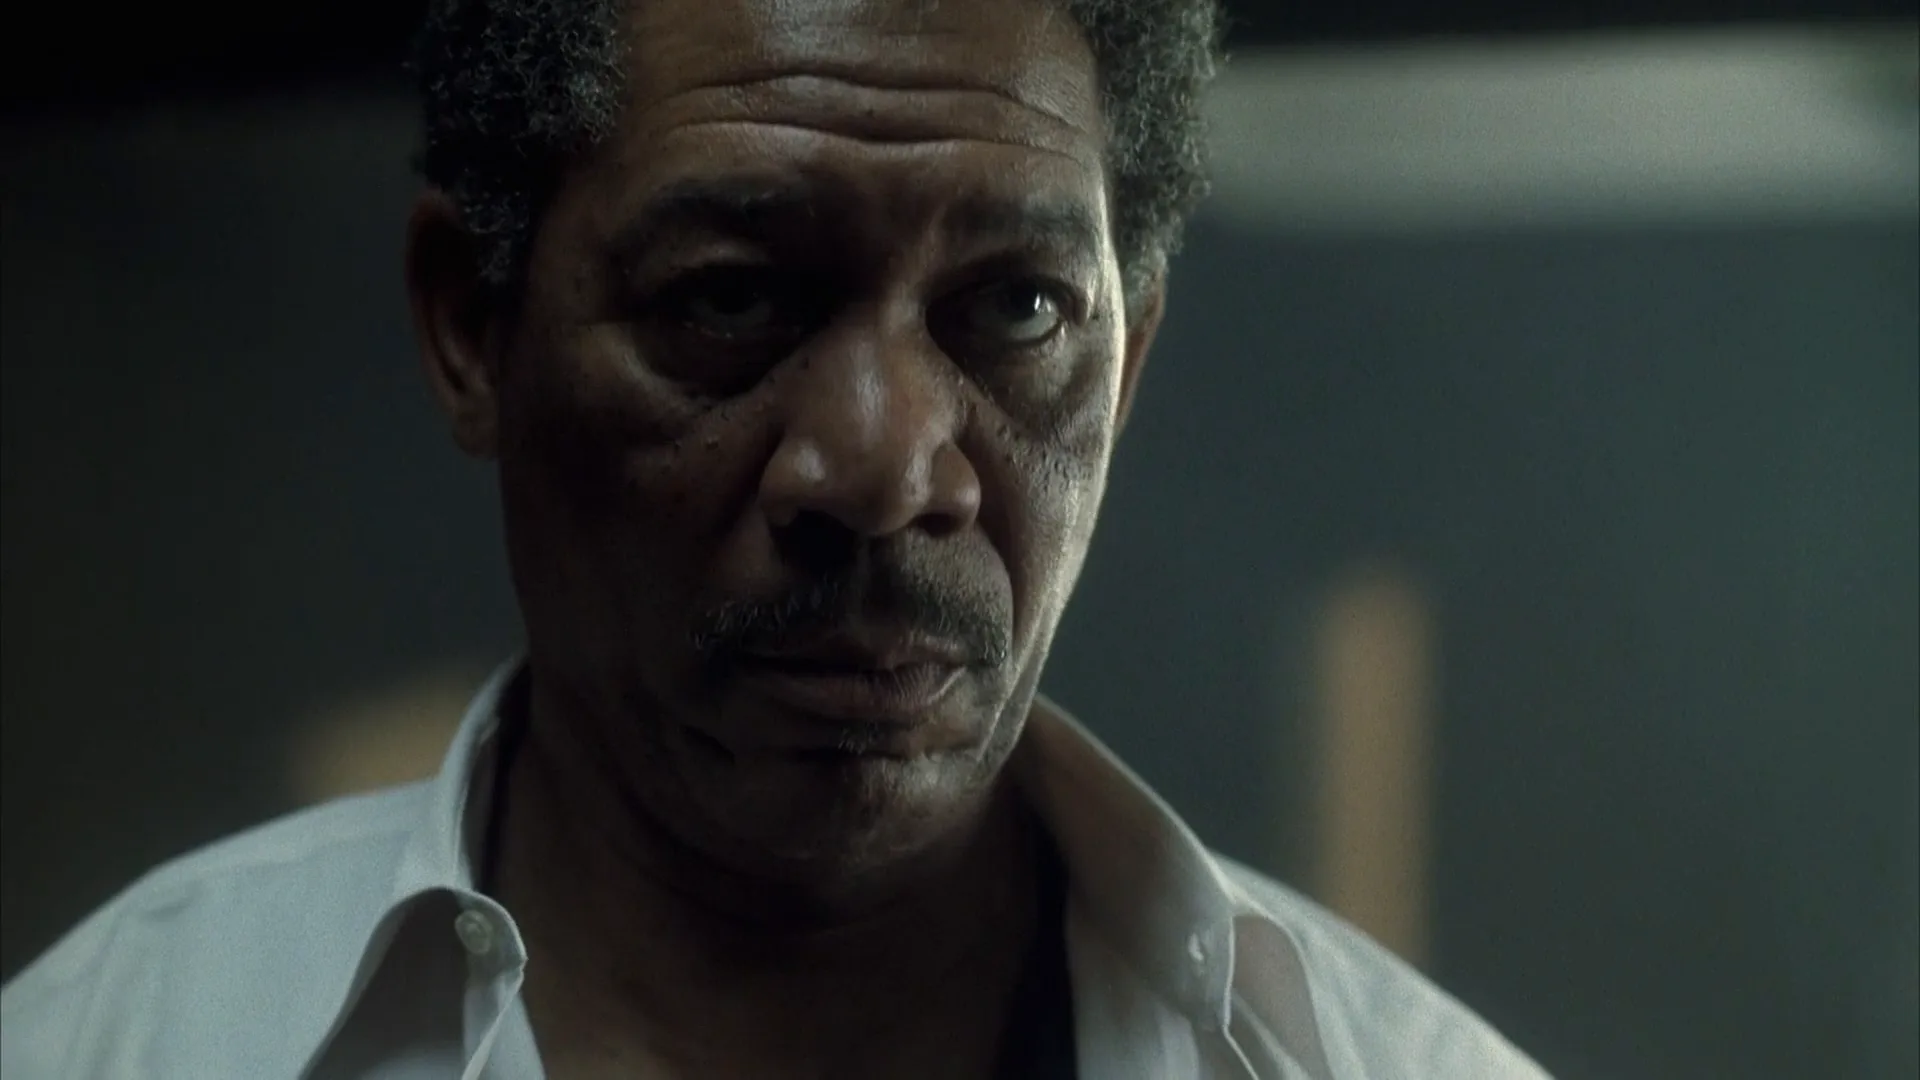
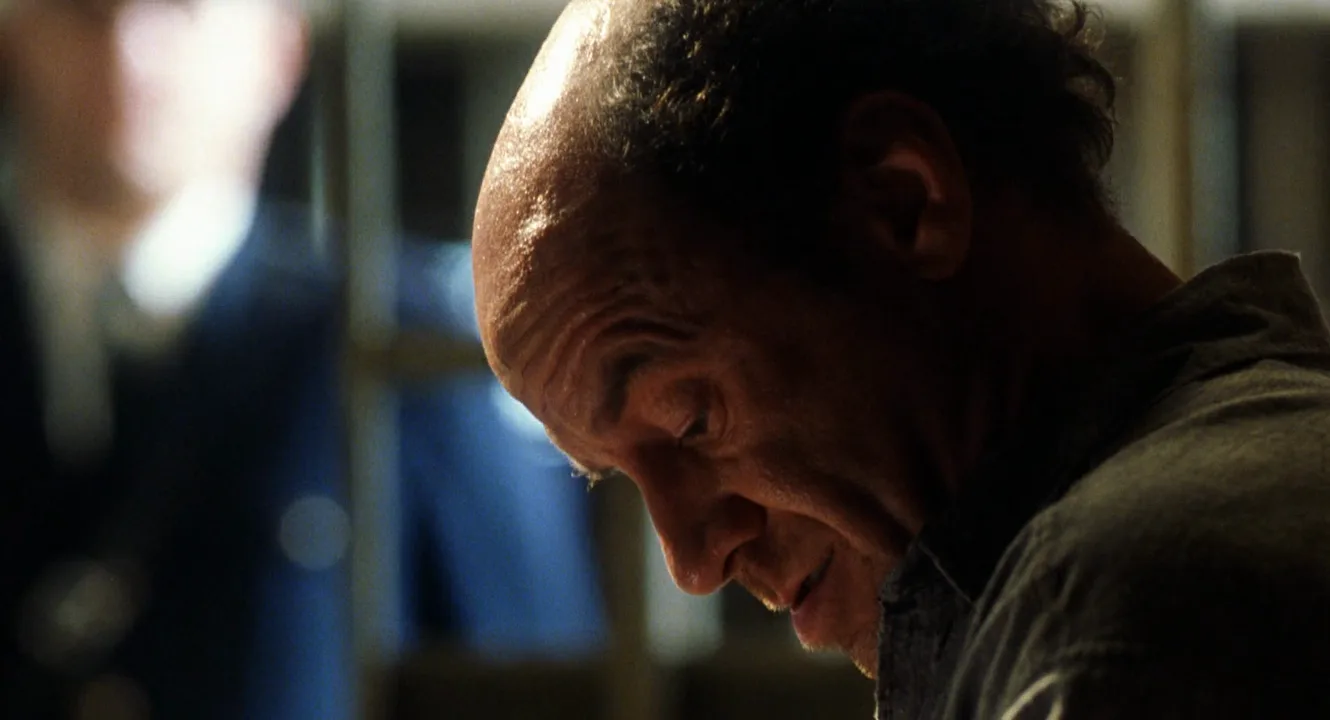
14 framesEvery frame below has a readable key; what changes is how much fill the cinematographer let into the shadow side. Compare the dark cheek, the far eye and the jaw line from frame to frame.
How to create a fill light with AI
4 promptsImage and video models rarely understand the phrase "fill light" on its own — they need the ratio described in visual terms: where the key is, how much darker the shadow side should be and what is still visible there. In FlashBoards you can keep the film frames above, your start frame and every re-lit take on one board and compare ratios side by side before you animate the one that works. The fourth prompt re-shoots a real film shot from a text description alone, and the original plays next to the result so you can compare.
Cinematic close-up of a woman in her late forties with a cropped silver undercut, a thin scar through her left eyebrow and freckled olive skin, wearing a rust-colored wool sweater, sitting at a wooden kitchen table at night holding a white ceramic mug with both hands. Soft warm tungsten key light from camera left at 45 degrees, gentle bounce fill from camera right, the shadow side of her face two stops darker but still showing skin texture and the far eye clearly, 4:1 lighting ratio, single catchlight in each eye. Dark background falling off to near black, 50mm lens at eye level, shallow depth of field, 35mm film grain.
"Key light from camera left at 45 degrees" fixes the direction; "two stops darker but still showing skin texture and the far eye" is what actually sets the fill — models understand a visible result better than a lamp name. "4:1 lighting ratio" reinforces it, and "single catchlight" stops the model from adding a second reflection from the fill.
Open FlashBoardsAnamorphic widescreen medium close-up of a man in his sixties with a white braided beard, deep-set gray eyes, weathered brown skin and round wire-rimmed glasses, wearing a yellow oilskin jacket, standing on a wooden fishing dock on an overcast bright afternoon. Soft daylight key from frame right, a large white bounce reflector filling from frame left so the shadow side is only one stop darker, 2:1 lighting ratio, open and friendly face with every wrinkle readable. Gray-green harbor water softly out of focus behind him, 75mm lens at eye level, natural colors.
The second take flips the mood: "large white bounce reflector filling from frame left" and "only one stop darker, 2:1" push the image to the open, high-fill end of the scale. Setting recipe 1 and this frame next to each other on the board shows how much the fill alone changes the character.
Open FlashBoardsCamera: a slow, steady push-in from close-up toward a tighter close-up of her face, starting immediately and ending on her eyes. Action: she is already lifting the white mug toward her lips; she takes a sip, lowers the mug to the table, then turns her head slightly toward the warm lamp light on the left and holds a thoughtful look. The lighting stays constant: warm key from the left, soft fill on the right side of her face, the shadow cheek dark but detailed throughout.The motion starts in the first words ("already lifting the mug"), so the shot is alive from frame one. The head turn toward the key changes how much of the face the fill has to carry, which makes the ratio visible in motion. "The lighting stays constant" keeps the model from brightening the shadow side as the camera moves in.
Open FlashBoards{
"output": "Full-screen live-action close-up from Malcolm X (1992), from its very first frame: one single continuous shot. Early-1990s 35mm color with soft grain, 16:9 frame. A dim prison workshop: a pale gray-blue painted brick wall far behind him, a dark vertical panel on the left edge of the frame and a dull dark-red shape hanging on the wall left of his head, all softly out of focus and a stop darker than his face. A soft key from high above and slightly frame right makes his scalp, forehead and the bridge of his nose shine; a soft fill from near the camera keeps both cheeks, both eyes and the jaw clearly readable about one stop darker, with gentle shade under the brows and under the chin and a soft shadow edge on the face. Muted slate blue, gray and deep brown palette.",
"characters": {
"S1": {
"name": "Baines, played by Albert Hall",
"look": "a heavy-set man in his late fifties, broad round face with full cheeks, a wide flat nose and full lips, deep dark-brown skin, deep lines across the forehead and under the eyes, head shaved very close with a faint sheen of sweat on the scalp, a trace of gray stubble on the upper lip and chin, a faded light-blue chambray work shirt open at the collar",
"voice": "low, calm, dry, measured"
},
"S2": {
"name": "Malcolm, played by Denzel Washington",
"look": "never seen: he stays off screen, just left of the camera; only his voice is heard, and only S1's face is ever on screen",
"voice": "young, streetwise, taunting"
}
},
"shots": [
{
"shot": 1,
"camera": "static camera, eye level, 85mm lens feel, tight close-up: S1's face fills most of the frame height, the top edge crops the crown of his head just above the forehead highlight, the bottom edge crops at the open shirt collar; his face sits right of the frame centre, the blurred wall and the dark-red shape fill the left third; the framing stays the same to the end",
"action": [
"BEGINNING: alive from the first frame, S1 sits in three-quarter view with his head turned toward frame left, eyes on someone just off frame left, lips closed, brows level, listening without a nod while the off-screen voice speaks.",
"THEN: he slowly turns his head toward the lens, his face drifting a little toward the frame centre, until he looks almost straight at the camera, eyes resting just left of the lens; his lips stay closed.",
"THEN: his brows lift and his eyes widen, and he says his first word as a flat, questioning echo; only his mouth moves, head and shoulders stay still.",
"THEN: he holds a hard, level stare just left of the lens, jaw still, mouth slightly open.",
"END: he speaks his last line slowly and pointedly, lips pushing forward on the words, eyes wide and unblinking; the lit scalp and the readable shaded cheeks keep the same contrast to the last frame."
],
"dialogue": [
{
"speaker": "S2",
"on_screen": false,
"when": "from the first frame, while S1 is still turned toward frame left",
"delivery": "taunting, quick",
"line": "<d>[English] What's your angle, nigga?</d>"
},
{
"speaker": "S2",
"on_screen": false,
"when": "a beat later, as S1 begins to turn",
"delivery": "short, prodding",
"line": "<d>[English] Hmm?</d>"
},
{
"speaker": "S1",
"on_screen": true,
"when": "right after he has turned to the lens and his eyes widen",
"delivery": "flat, questioning echo",
"line": "<d>[English] Nigga?</d>"
},
{
"speaker": "S1",
"on_screen": true,
"when": "near the end of the shot, after the held stare",
"delivery": "slow, cutting, quietly amused",
"line": "<d>[English] Who's wearing the conk?</d>"
}
]
}
],
"sound": {
"ambience": "quiet room tone of a prison workshop, a faint machine hum heard from far away",
"speech": "exactly these spoken phrases, each said once, in this order",
"never_spoken": "no narration and no voice-over: the descriptions, performance notes and step words of this prompt are never spoken aloud",
"music": "a film score under the scene, always below the voices: a low, sombre muted-trumpet and strings line with a slow pulse",
"subtitles": "none"
}
}Remakes the static close-up of Baines from Malcolm X (1992), dir. Spike Lee, DP Ernest Dickerson: the high soft key, the fill that keeps both cheeks readable, the slow turn toward the lens and his exchange with Malcolm off screen, word for word.
The output line states the ratio as visible results: a soft key from high above that makes the scalp and forehead shine, and a soft fill from near the camera that keeps both cheeks, both eyes and the jaw clearly readable about one stop darker. The corpus lines stay word for word, and keep the same contrast stops the model from flattening the fill as he turns to the lens.
Common mistakes
- Flat beauty light by default. Many models light faces almost evenly. State the key direction and how much darker the shadow side should be ("two stops darker", "4:1 ratio") — otherwise you get 1:1.
- "Moody" becomes black. Words like moody or dramatic often crush the shadow side to pure black. Say what is still visible there: "skin texture on the shadow cheek, the far eye readable".
- The fill shows up as a lamp. Writing "fill light" can make a model draw a softbox in the frame. Describe it as off-screen: "soft bounce from camera right".
- Double catchlights and double shadows. A fill described as strong or hard adds its own shadow under the nose. Keep it "soft" and "gentle" and ask for a "single catchlight".
- Light drift in video. As the camera moves, video models tend to lift the shadows. Repeat the lighting setup in the video prompt and add "the lighting stays constant".
Keep the reference frames, prompts and every generated take side by side — images and video in one canvas.
FAQ
6 questionsWhat is fill light in film?
Fill light is a secondary, softer light placed on the side opposite the key light to brighten the shadows the key creates. It does not change the direction of the light; it controls how dark the shadow side of a face becomes. Its strength relative to the key — the lighting ratio — decides whether the image looks open and bright or moody and sculpted.
What is the difference between key light and fill light?
The key light is the brightest source and sets the direction, hardness and color of the light on a subject. The fill light is weaker and softer, sits on the opposite side near the camera and only lifts the shadows. Turn off the key and the image loses its direction; turn off the fill and the shadow side simply gets darker.
What is a good key-to-fill ratio?
There is no single right number; it depends on the mood. About 2:1 (one stop) gives a bright, friendly look used in comedies and sitcoms. Around 4:1 (two stops) is the classic natural drama ratio. 8:1 (three stops) and higher reads moody and is common in thrillers, crime films and night scenes.
Can a reflector be used as fill light?
Yes, and it is one of the most common fills. A white board, foam core or collapsible reflector bounces part of the key back into the shadow side, so the fill automatically matches the key's color. White gives a subtle lift, silver a stronger and crisper one, gold a warm tone. Distance controls the strength: move it closer for more fill, farther for less.
Where should you place a fill light?
Place the fill on the shadow side of the subject, close to the camera and roughly at lens height or slightly above. The nearer it is to the lens axis, the fewer extra shadows it creates.
Do you always need a fill light?
No. Many scenes use no dedicated fill lamp at all: a large soft key, bounce from walls and floors, or ambient daylight already fill the shadows. Low-key and noir looks deliberately keep fill to a minimum.
Related terms
7- Key LightLighting
The key light is the main light on a subject: it sets the direction, hardness and color of the illumination, and every other source — fill, back, practicals — is balanced against it.
- BacklightingLighting
Backlighting places the light behind the subject, facing the camera: it outlines hair and shoulders, separates the figure from the background, makes smoke and dust glow and, with no light from the front, turns people into silhouettes.
- Rim LightLighting
A rim (edge) light sits behind and to the side of the subject, drawing a thin bright line along the edge of the head, shoulders or profile to pull it off a dark background.
- Bounce LightingLighting
Bounce lighting aims a lamp — or the sun — at a white board, foam core, wall or ceiling instead of at the subject, turning a hard source into a broad, soft fill that wraps around faces.
- ContrastLighting
Contrast is the difference between the brightest and darkest parts of an image — set on set by the ratio between key and fill — and ranges from flat, gentle low contrast to hard, graphic high contrast.
- High-Key LightingLighting
High-key lighting is bright and even, with plenty of fill and a low key-to-fill ratio, so the frame is dominated by light tones and gentle shadows — the look of sitcoms, comedies, commercials and dreamlike heavens.
- Film LightingLighting
Film lighting is the craft of shaping light for the camera — its direction, quality, color and contrast — to model faces, build space, set the time of day and carry the mood of a scene.
Further reading
Blain Brown, Motion Picture and Video Lighting (Focal Press). · Harry C. Box, Set Lighting Technician's Handbook (Focal Press). · American Cinematographer magazine, ASC.